As a long-time Linux user, one of the most essential tools in my arsenal is GParted (GNOME Partition Editor). It’s a powerful and reliable graphical utility that makes managing disk partitions incredibly straightforward. Whether I’m preparing a PC for a dual-boot setup with Windows, reorganizing my storage, or creating new partitions for data, GParted is the tool I always turn to.
Table of Contents
It runs from a live environment, meaning you boot it from a USB stick, which allows it to safely modify partitions that are not in use, including the main system drive. This guide will walk you through the process I use to resize a Windows partition to make space for a new Linux installation.
🚀 Creating a Bootable GParted USB
Before I can do anything, I need to create a bootable USB drive with the GParted Live image. It’s a simple process that requires the GParted ISO file and a tool to write it to a USB stick.
- First, I download the latest GParted Live ISO from the official website.
- Next, I use a tool like balenaEtcher or Rufus to write the ISO file to a USB drive. This process will erase everything on the drive, so I always make sure to use a blank one or back up its contents first.
- With the bootable USB created, I restart the computer I want to partition and boot from the USB drive. This might require changing the boot order in the computer’s BIOS/UEFI settings.
↔️ How to Resize a Windows Partition
One of the most common reasons I use GParted is to shrink an existing Windows partition to make room for Linux. It’s a delicate operation, but GParted makes it safe and easy, as long as you have a backup.
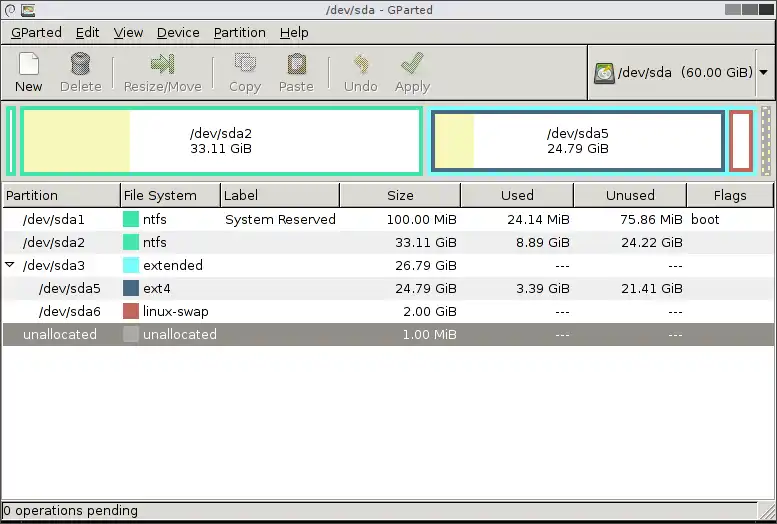
- Once GParted has booted, it displays a graphical representation of my hard drive and its partitions.
- I right-click on the main Windows partition (usually the largest one, formatted as NTFS) and select the ‘Resize/Move’ option.
- A new window appears with a graphical slider. I can drag the edge of the partition to shrink it, or I can enter the desired new size in megabytes. I always leave some free space for Windows to function properly.
- After setting the new size, I click the ‘Resize/Move’ button. It’s important to note that GParted doesn’t apply the changes immediately; it queues them up. I need to click the green checkmark icon on the toolbar to apply all the pending operations.
➕ Creating New Partitions for Linux
After shrinking the Windows partition, I’m left with a block of unallocated space on my drive. This is where I’ll create the new partitions for my Linux installation. I right-click the unallocated space and select ‘New’.
For a standard Linux setup, I create at least two partitions:
- A large ext4 partition that will serve as the root (`/`) directory for the Linux system. This is where the operating system and all my programs will be installed.
- A small linux-swap partition, which acts as virtual memory for the system. A general rule of thumb is to make it the same size as my computer’s RAM.
Once I’ve defined these new partitions, I apply the changes, and my drive is perfectly prepared for a dual-boot installation. For anyone new to Linux, I highly recommend checking out a guide on how to choose a beginner-friendly distro.
- Build a Python Chat Server: A Beginner’s Guide to Sockets and Threads
- A Practical Guide to Strace in Linux: Debugging the Undebuggable
- A Guide to PostgreSQL – How to Optimize Database Performance
- A Guide to Regex – How to Use Regular Expressions with grep
- A Guide to DNF – How to Manage Software Packages in Fedora
- A Beginner’s Guide to Godot – How to Start Developing Video Games
- An Introduction to Ansible – How to Automate Your System Administration