Hey there, gamers! Building a new PC can seem like a big task, especially when you’re on a budget. But guess what? You can still get an awesome gaming experience without spending a fortune! Today, I’m going to walk you through how to build a powerful gaming PC for just $999.
Table of Contents
🎮 Your Ultimate Guide
Many people wonder about the ideal budget for a PC. More money usually means more performance. However, there’s a “sweet spot” where you get the most value for every dollar spent. We’re aiming for that sweet spot with this build!
🛠️ What You’ll Need: The Components
Here are the parts we’ve chosen for our $999 gaming PC, focusing on getting you the best “bang for your buck”:
- Processor (CPU): AMD Ryzen 5 2600 – $160. This AMD processor offers incredible value. With 6 cores and 12 threads, it’s more than enough for most games. Plus, it’s unlocked for easy overclocking, making it a real winner.
- Graphics Card (GPU): XFX Radeon RX 590 8GB Fatboy OC+ – $280. This GPU gives you fantastic value for your money. It delivers smooth frame rates at 1080p resolutions. XFX’s version looks clean, despite its faux carbon fiber and bright red fan stickers.
- Motherboard (Mobo): MSI B450M Mortar – $95. This is an excellent budget-friendly motherboard. It has stylish heatsinks, a reinforced PCIe bracket, and lots of connectivity options. MSI also has one of the best BIOS user interfaces out there.
- Memory (RAM): 16GB (2x 8GB) HyperX Predator @ 3,200MT/s – $157. Ryzen CPUs love high-frequency memory, and 3,200MT/s is perfect for this system. 16GB is ideal for 1080p and 1440p gaming, and allows you to run multiple programs smoothly.
- Storage (SSD): 480GB Adata SU630 2.5-inch SSD – $58. This SSD offers great value at just $58. While you’ll need to manage your apps and media carefully, it provides the speed benefits of an SSD.
- CPU Cooler: Stock (AMD Wraith Stealth) – $0. The Ryzen 5 2600 comes with this cooler, so it’s free. The Wraith Stealth is a low-profile, air-cooled heatsink that handles the processor’s heat output effectively. It even comes with thermal paste pre-applied.
- Power Supply (PSU): 500W Cooler Master MasterWatt Lite – $50. Our system will draw around 315W at max load. This 500W PSU gives us plenty of headroom for future upgrades and overclocking. Choosing a branded PSU is smart for warranty purposes.
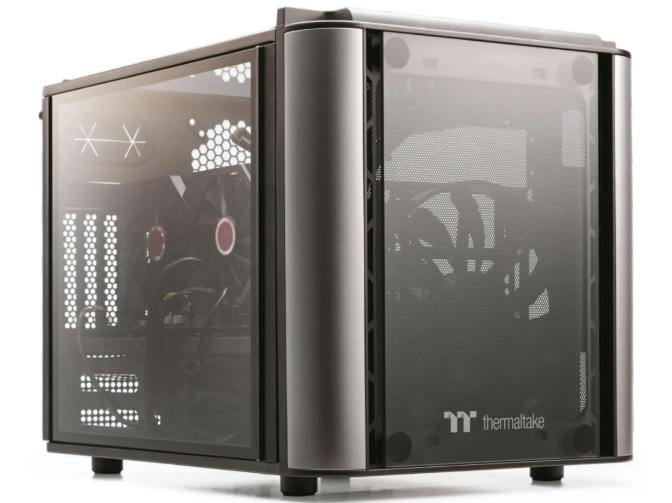
- Case: Thermaltake Level 20 VT – $99. This MicroATX case is a unique choice with its horizontal motherboard mounting system and large 200mm front fan. Its modularity is a big plus.
- Operating System (OS): Windows 10 Home (64-bit) OEM – $100. Windows 10 is still a popular choice for gaming. If you already have a license, you can save this cost.
Total Cost: $999
💻 Step-by-Step PC Assembly
Let’s put it all together!
- Prepare the Case: First, remove all the panels from your case, especially the tempered glass ones, and put them somewhere safe. Clear out any internal mounting hardware you won’t need. Make sure your workspace is static-free by grounding yourself on a metal object.
- Install the Motherboard: Start by fitting the rear I/O shield into the case, making sure it’s oriented correctly. Then, gently slide your motherboard onto the stand-offs inside the case and secure it with screws. If you have an advanced cooler, you might install its mounting hardware before the motherboard.
- Seat the Processor: Installing Ryzen CPUs is straightforward. Lift the retention arm on the CPU socket. Align the gold triangle on your CPU with the one on the socket. Gently place the CPU into the socket without forcing it. Then, lower and secure the retention arm.
- Install the Cooler: For the stock Wraith Stealth cooler, you’ll need to unscrew and remove the two mounting brackets on the motherboard (north and south of the CPU). Keep the backplate in place. Gently put the cooler on top of the CPU and tighten the screws in a diagonal or star pattern until it’s secure. Don’t forget to connect the fan cable to the CPU fan header.
- Add the RAM: This is a simple step! Open the retention clips on the DIMM slots. Align the notch on the RAM stick with the notch in the slot. Push down firmly until it clicks into place and the clips latch shut. For dual-channel performance, use the color-coded slots as indicated in your motherboard manual.
- Mount the Power Supply: The Thermaltake Level 20 VT case has a unique PSU installation method. You’ll need to remove two thumb screws from the floor panel, then lift the entire chassis frame out of its base. Place the PSU in the bottom plate, or secure it to the frame first, then drop the frame back down and secure everything. Make sure the PSU fan faces downward.
- Manage Your Cables: Start plugging in your main power cables: the 24-pin motherboard power, the PCIe power for the GPU, and the 8-pin CPU power. Try to pre-route them neatly through the case’s routing holes to keep them out of the way and improve airflow. Use cable ties to secure excess cables.
- Install the GPU: Remove the two screws holding the rear PCIe covers on your case. Carefully align your graphics card with the top PCIe slot on your motherboard (often reinforced with steel). Firmly push the GPU into place until it locks. Then, plug in the PCIe power cables to your GPU; they are designed to fit only where they belong.
- Mount the SSD: Our chosen case’s SSD mounts are a bit unconventional. You’ll insert the drive into a provided tray, then screw the tray into the chassis. Since our SSD has no moving parts, you can orient it any way you like if the mounts are awkward. Connect the SATA data and power cables to the drive. The SATA data cable then plugs into the motherboard, and the power cable goes to the PSU.
- Connect Front Panel Cables: These small, individual cables connect your case’s power button, reset button, and LEDs to the motherboard. Consult your motherboard manual for the exact pin layout, as it can vary. Pay attention to the + and – markings for the LEDs. Also, connect any front panel USB and audio headers.
- Final Checks and Software: Once all components are installed and cabled, double-check every connection to ensure everything is firmly seated. Then, close up your case panels carefully, wiping away any fingerprints on tempered glass. Now, it’s time to install Windows! You’ll need a Windows installation USB. Boot from it, enter the BIOS to set the USB as the first boot device, save, exit, and follow the on-screen instructions for installation.
✨ Your New PC Awaits!
Congratulations! You’ve (probably) successfully built your own gaming PC. This is just the beginning; you can always add more components or customize it further. Enjoy your new machine!
Troubleshooting Tip: If your PC doesn’t power on, check the connections between your PSU and motherboard. If you get power but no boot, check the RAM and try different slots. Also, ensure your video cable is plugged into the graphics card, not the motherboard. Many manufacturers offer excellent support if you’re stuck.
Storey, Zak. “Build a $999 Gaming PC.” PCHardware Handbook 7th Edition, 2025, pp. 38–49.
- NVIDIA to Invest $5 Billion in Rival Intel in Landmark AI Chip Collaboration
- Spotify Premium Lossless Audio: How to Enable Hi-Fi Streaming
- Apple Event September 2025: Everything Announced – iPhone 17, AirPods Pro 3, Apple Watch & More
- iPhone 17 Series Unveiled at Apple Event: 17, 17 Air, and 17 Pro Redefine Innovation
- A Guide to Factory Reset Google Pixel/Android with Family Link Account | Safely Remove Child’s Account
- How to Recover Permanently Deleted Files on Mac
- How to Remove Microsoft Store Ads Showing Up on Windows