In the high-stakes tactical landscape of Counter-Strike 2, the opening seconds of a round can often determine its outcome. On a map as complex and dynamic as Ancient, gaining early map control as the Counter-Terrorist side is absolutely crucial. One of the most powerful, yet difficult to master, utility throws is the instant T-Doors smoke from the CT spawn.
Table of Contents
- 1.1 The Strategic Importance of the T-Doors Smoke
- 1.1.1 Shutting Down the T-Side Rush
- 1.1.2 Enabling Safe AWPer Setups
- 1.1.3 Dictating the Pace of the Round
- 1.2 The Mechanics of a Perfect Spawn Throw
- 1.2.1 The Running Jump Throw
- 1.2.2 Understanding Spawn-Dependent Lineups
- 1.2.3 The Body-Blocking Problem (And How to Solve It)
- 1.3 The Five Spawn Lineups: A Conceptual Guide
- 1.3.1 Spawn 1
- 1.3.2 Spawn 2
- 1.3.3 Spawn 3
- 1.3.4 Spawn 4
- 1.3.5 Spawn 5
This single, perfectly thrown smoke grenade, landing just as the round begins, can completely neutralize early Terrorist aggression towards the critical Mid area, buying your team precious time to establish a formidable defensive setup.
While many players are familiar with smoking this area from closer positions, the spawn-based throw is a high-level technique that can give your team an immediate and often insurmountable advantage. This guide will not only cover the concept behind these spawn-based smokes but will also provide a deep dive into the strategy behind them, explain the mechanics required for a perfect throw, and offer tips on how to practice and master this game-changing piece of utility.
The Strategic Importance of the T-Doors Smoke
Throwing a smoke grenade may seem like a simple action, but the strategic implications of landing an instant T-Doors smoke from the CT spawn are vast. This is not just about blocking a sightline; it’s about fundamentally altering the entire opening dynamic of the round in your team’s favor.
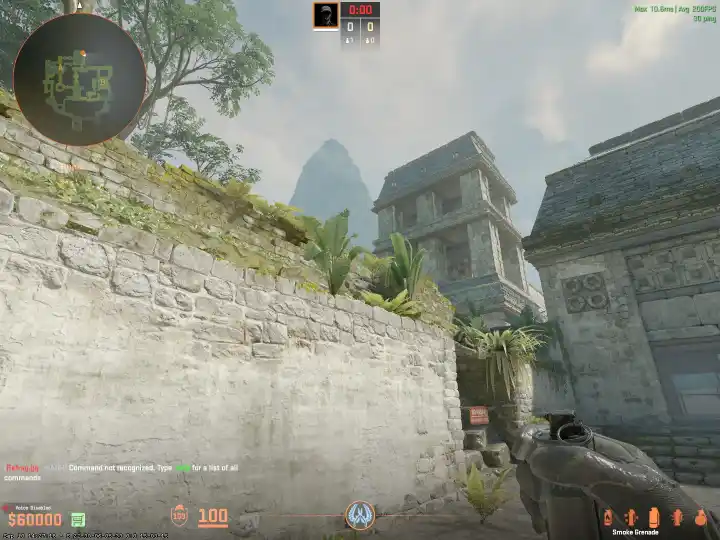
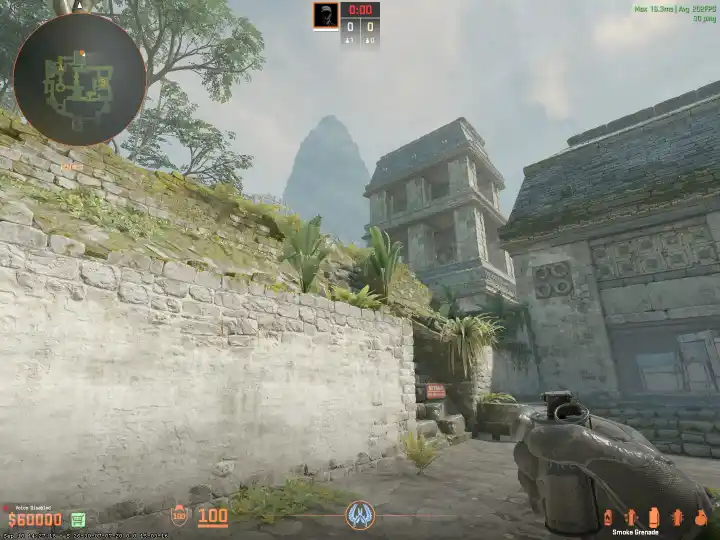
Shutting Down the T-Side Rush
The area just outside the T-side spawn, often called “T-Doors” or “Cave,” is the primary staging ground for any Terrorist attempt to take early control of Mid or execute a fast split towards the A site. Without a smoke, CT players, especially AWPers, are exposed to this angle the moment they peek Mid. An instant smoke grenade that blooms just as the round starts completely blinds this aggressive push. It forces the T-side onto the back foot, compelling them to choose between three bad options:
- Wait: They can wait for the smoke to fade, giving your team a full 18 seconds to get into strong, post-plant positions and crossfires.
- Waste Utility: They can use their own utility (HE grenades, flashes, or another smoke) to counter yours, depleting their resources before they’ve even gained any map control.
- Push Blindly: They can push through the smoke, emerging one by one into a pre-aimed CT setup, which is almost always a death sentence.
Enabling Safe AWPer Setups
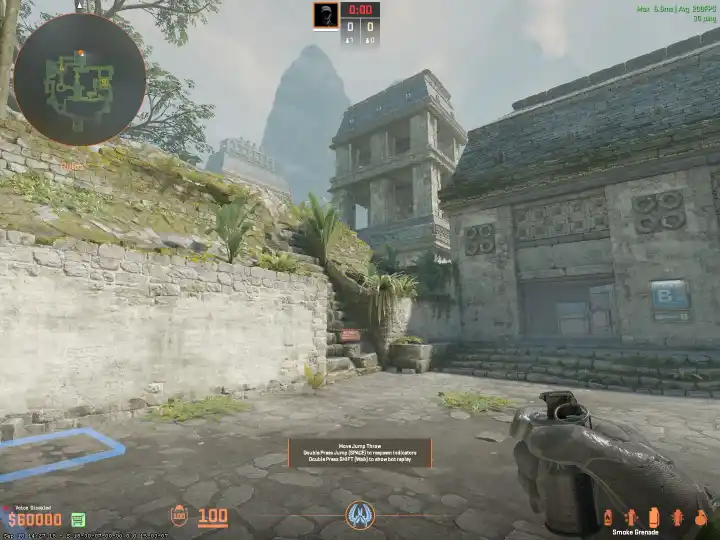
This smoke is an AWPer’s best friend on Ancient. It provides a crucial curtain of cover that allows your team’s AWPer to safely cross from the A side of Mid to more aggressive and powerful positions, such as the top of Mid or the “Cubby” area. Without this smoke, crossing that gap is a high-risk gamble against a potentially watching T-side AWPer. By providing this cover, the smoke enables your most powerful player to get into position safely, ready to punish any Terrorists who disrespect the smoke or attempt to push another area of the map.
Dictating the Pace of the Round
Ultimately, this smoke allows the CT side to dictate the tempo of the early round. Instead of reacting to the Terrorists’ aggression, you force them to react to your defensive play. It transforms a potentially chaotic 5v5 brawl for Mid control into a controlled, methodical setup where your team holds all the advantages. This early control often snowballs, allowing your team to gather information and rotate effectively long before the T-side can establish a foothold.
The Mechanics of a Perfect Spawn Throw
Executing these smokes requires precision and a mastery of a core CS2 mechanic: the running jump throw.
The Running Jump Throw
This is a fundamental technique for throwing grenades long distances with consistent results. The process involves a fluid combination of movements: you hold your ‘W’ key to run forward, press your jump key, and release the grenade at the absolute peak of your jump. For maximum consistency, it is highly recommended that competitive players use a “jump throw bind,” which is a simple script that binds the jump and the grenade release to a single key press, ensuring a perfect throw every time.
Understanding Spawn-Dependent Lineups
A key concept for advanced utility is that your spawn point is not the same every round. In the CT spawn on Ancient, there are several distinct positions where you can appear. Because of these slight variations in starting position, a single smoke lineup will not work for every spawn. This is why advanced guides provide multiple, distinct lineups—one for each specific spawn point—to ensure you can throw the smoke consistently regardless of where the game places you at the start of the round.
The Body-Blocking Problem (And How to Solve It)
In a real match, a major obstacle to executing these throws is your own teammates. At the start of the round, everyone is rushing forward to get to their positions. If you try to perform a precise running lineup immediately, you will almost certainly collide with a teammate, which will ruin your throw and waste a valuable smoke. The solution is simple but requires discipline: wait a second or two. Let your teammates run ahead and clear your path. This small delay will not affect the timing of the smoke landing and will ensure you have a clear, unobstructed path to execute your lineup perfectly.
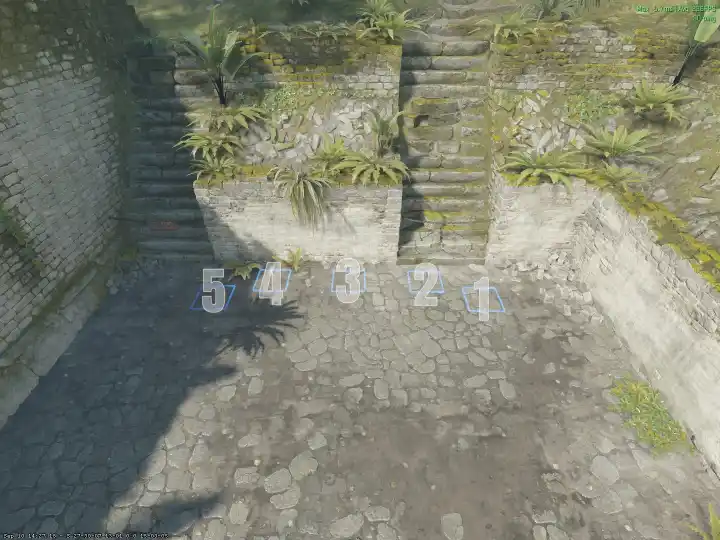
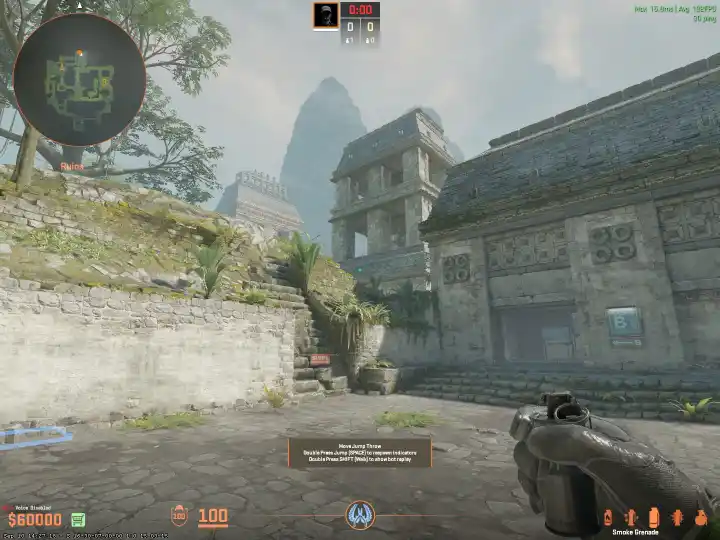
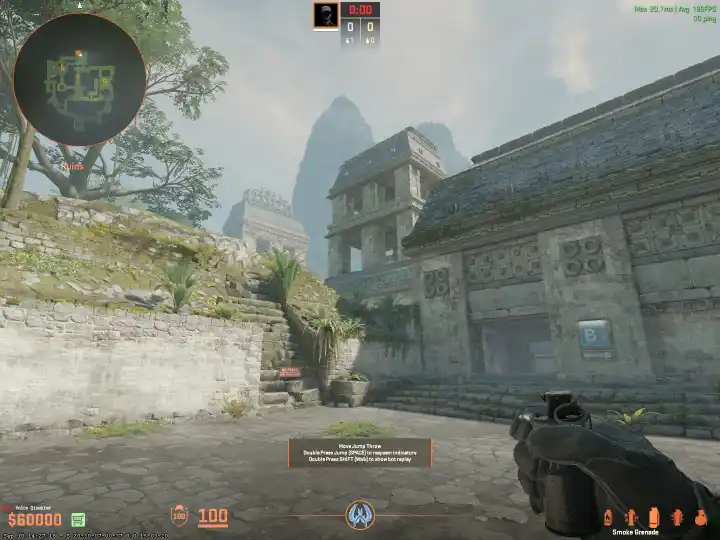
The Five Spawn Lineups: A Conceptual Guide
The key to any spawn-based throw is a precise visual lineup. While this guide cannot replicate the exact images of where to aim, we can describe the methodology and provide a roadmap for you to practice and master these throws yourself.
The best way to learn these is to load into a private server. Use the following console commands to help you practice:
sv_cheats 1(enables cheats)sv_grenade_trajectory 1(shows the arc of your grenade)sv_infinite_ammo 1(gives you unlimited grenades)give weapon_smokegrenade(gives you a smoke)
Once in the server, go to the CT spawn and identify the five common spawn positions. For each one, you will need to find a unique, pixel-perfect visual cue on the map geometry (a specific crack in a stone, the corner of a texture, a leaf on a tree) to aim at.
Here is a conceptual breakdown of what to look for based on community-found lineups:
Spawn 1
Spawn 2
Spawn 3
Spawn 4
Spawn 5
By fLix ☁
- Wobbly Life: How to Find the Secret Free Motorcycle
- Femboy Futa House – How to Open the Phone and Solve Missing Icon Issues
- Deep Rock Galactic: Survivor – The Ultimate Hazard 5 Strategy Guide
- Deep Rock Galactic: Survivor – A Complete Guide to All Achievements
- Mars Attracts – Save File Location
- Arena Breakout: Infinite How to Play 4:3 Stretched Resolution (Nvidia & Amd Guide)
- Arena Breakout: Infinite – How to Boost FPS/Performance