In the brutal, unforgiving world of Castor Woods, your survival often depends not on the weapons you find, but on the weapons you can create. The key to unlocking the most powerful and versatile gear in Dying Light: The Beast is the game’s crafting system, which is fueled by blueprints hidden throughout the world. These permanent recipes are your ticket to crafting everything from essential gear and powerful weapon mods to unique ammunition types.
Table of Contents
- 1.1 The Art of Crafting and Finding Blueprints
- 1.1.1 What are Blueprints?
- 1.1.2 Upgrading Your Blueprints
- 1.1.3 The Hidden Blueprint Mechanic: Break Everything!
- 1.2 National Park Blueprint Locations
- 1.2.1 Blueprint #1: Hunter’s Bow (Unmissable)
- 1.2.2 Blueprint #2: Fire Arrows
- 1.3 Old Town Blueprint Locations
- 1.3.1 Blueprint #3: Reforged Khanjar
- 1.3.2 Blueprint #4 & #5: Weapon Reinforcement & Stamina Booster
Finding these blueprints is one of the most important progression paths in the game. This guide is a community-driven effort to document the location of every single blueprint in Dying Light: The Beast. We will provide detailed, step-by-step walkthroughs for each known blueprint, organized by the major regions of the world. As the community discovers more, this guide will be updated.
The Art of Crafting and Finding Blueprints
Before we dive into the locations, it’s important to understand how blueprints work and what to look for during your exploration.
What are Blueprints?
Blueprints are permanent, one-time-use items that, once collected, add a new recipe to your crafting menu forever. Once you have learned a blueprint, you can craft that item as many times as you like, provided you have the necessary resources. This makes finding blueprints far more valuable than finding a single high-tier weapon, as you can create an endless supply of them.
Upgrading Your Blueprints
Finding a blueprint is just the first step. As you progress through the game and gather more advanced resources, you can upgrade each blueprint at a workbench. Upgrading a blueprint will increase the damage, durability, or effectiveness of the crafted item, often adding new mod slots or bonus effects. The “Craftsman” achievement requires you to fully upgrade every single blueprint, a true endgame challenge.
The Hidden Blueprint Mechanic: Break Everything!
A crucial tip for any aspiring treasure hunter in Dying Light: The Beast is that not all secrets are simply sitting on a table waiting to be found. The game world is filled with environmental puzzles. Be on the lookout for weak-looking walls, cracked floors, boarded-up doors, and other destructible crates and objects.
Some of the rarest blueprints in the game are not in plain sight but are hidden behind these environmental puzzles. If something looks like it can be broken, give it a good whack with your weapon—you never know what secrets might be revealed.
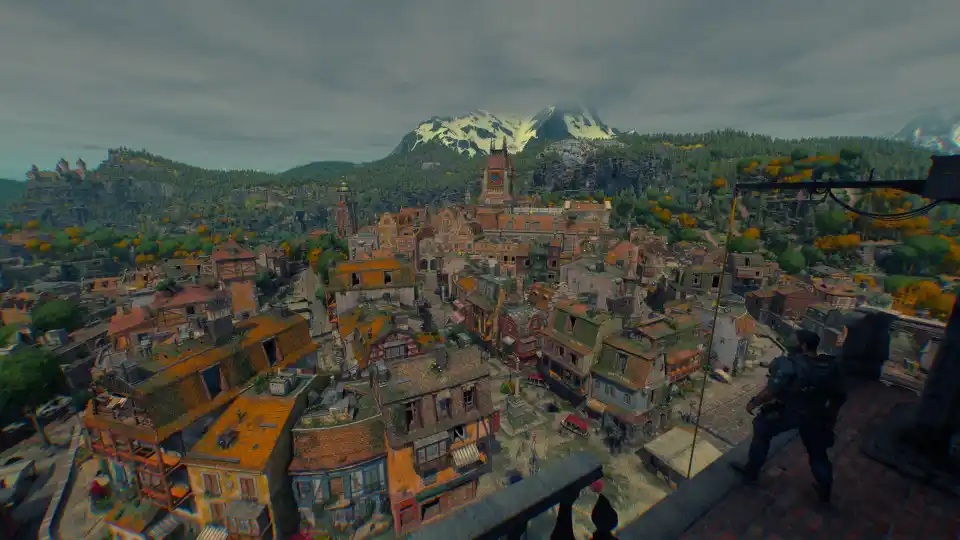
National Park Blueprint Locations
The National Park is the first major region you will explore in Castor Woods. It is home to several essential early-game blueprints that will give you a significant advantage.
Blueprint #1: Hunter’s Bow (Unmissable)
- Location: Inside the Monastery, which is the main safe zone you establish during the “Safe Haven” story quest.
- Walkthrough: This is the first blueprint you will likely acquire, and it is a crucial one. It is a direct reward for completing the “Safe Haven” main story quest. After you have fought and defeated the terrifying Chimera boss at the end of the quest, a cutscene will play, and you will wake up inside the now-secured monastery. The blueprint for the Hunter’s Bow is sitting on the workbench directly next to your new sleeping bag. As this becomes your primary hub for this part of the story, it is practically unmissable.
- Strategic Value: The Hunter’s Bow is arguably the best early-game weapon. It allows you to silently take down both infected and human enemies from a safe distance, conserving your more valuable and noisy firearm ammunition. Crafting arrows is also relatively cheap. Make this your top priority.
Blueprint #2: Fire Arrows
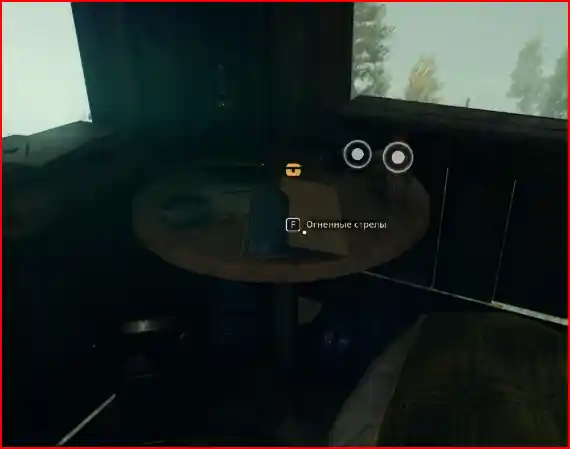
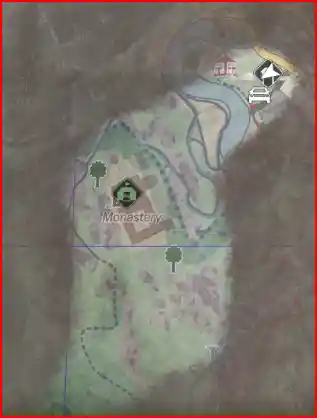
- Location: On top of the large radio tower located to the northeast of the Monastery.
- Walkthrough: Look on your map for a large radio tower icon to the northeast of the Monastery. Getting to the top of this tower is a significant parkour challenge that will test your climbing skills. You will need to carefully navigate a series of treacherous ladders, rusted platforms, and long jumps. Once you reach the very top, you will find a small, makeshift survivor’s camp with a bed and some supplies. The Fire Arrows blueprint is located right next to this bed.
- Strategic Value: Fire Arrows are a massive upgrade for your Hunter’s Bow. They provide excellent crowd control by setting enemies and the environment on fire, dealing significant damage-over-time to even armored targets.
Old Town Blueprint Locations
After you progress further in the story, you will reach the more urban area of Old Town, which holds its own set of valuable blueprints.
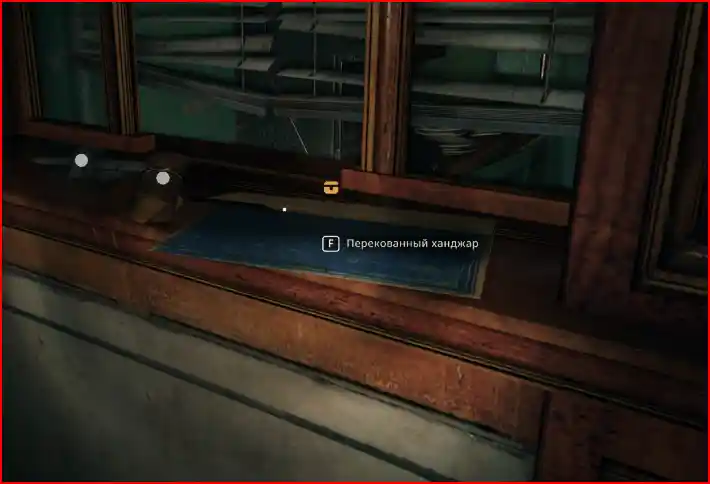
Blueprint #3: Reforged Khanjar
- Location: Inside the Town Hall in the center of Old Town.
- Walkthrough: This blueprint only becomes accessible after you have completed the “New Friends” main story quest. This quest involves you restoring power to the Town Hall and saving the survivors who are holed up inside. Once the power is on and the Town Hall becomes a major safe zone, you will be able to access the previously locked upstairs rooms. The Reforged Khanjar blueprint is located in one of these newly opened rooms, often on a desk or a table.
- Strategic Value: The Khanjar is a fast and deadly one-handed slashing weapon. It is excellent for quick, agile combat styles and for dealing with fast-moving enemies like Virals.
Blueprint #4 & #5: Weapon Reinforcement & Stamina Booster
- Location: These two blueprints can be purchased from the merchant located inside the now-liberated Town Hall.
- Walkthrough: After you have secured the Town Hall and it becomes a bustling safe zone, a merchant will set up shop inside. When you speak to them and browse their wares, they will have two essential blueprints for sale. While the exact names may vary slightly, they are the Weapon Reinforcement blueprint and the Stamina Booster blueprint.
- Strategic Value: These are arguably two of the most important blueprints in the entire game.
- Weapon Reinforcement allows you to craft components that significantly increase the durability and number of repairs for your favorite melee weapons, a critical feature for the late game.
- The Stamina Booster allows you to craft a powerful consumable that temporarily grants you infinite stamina, which is an absolute game-changer for both difficult parkour challenges and intense combat encounters. You should purchase both of these blueprints as soon as you have the money.
This guide is a living document. If you find a blueprint that is not listed here, please let us know in the comments below, and we’ll add it to the list. Happy hunting!
By Chi_p
- Dying Light: The Beast – The Ultimate Advanced Graphics Guide
- Dying Light: The Beast – A Complete Guide to All Safe Locations and Codes (Old Town)
- Dying Light: The Beast – A Complete Walkthrough for the ‘Safe Haven’ Quest
- Dying Light: The Beast – How to Open the Locked Train Car on the Bridge
- Dying Light: The Beast – A Spoiler-Free Guide to the Main Story Achievements
- Dying Light: The Beast – The Full Story of Kyle Crane
- Dying Light: The Beast – A Complete Guide and Roadmap to All 31 Achievements