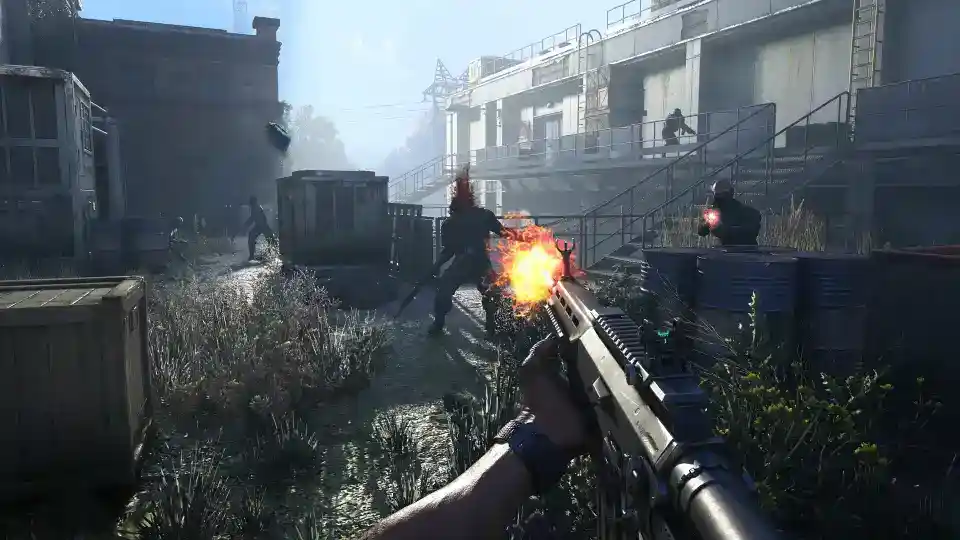
In the brutal, unforgiving world of Castor Woods, the night is not your friend. When the sun goes down, the hunt begins, and the terrifying infected that rule the darkness are relentless. In this hostile new world, your only bastions of hope are the fortified Safe Spots scattered across the map. These are more than just checkpoints; they are your lifeline, your sanctuary, and your key to surviving until dawn.
Table of Contents
- 1.1 The Importance of Safe Spots: Your Survival Handbook
- 1.1.1 More Than Just a Bed
- 1.1.2 The Process of Unlocking a Safe Spot
- 1.2 The Complete Safe Spot Location and Reward List
- 1.2.1 1. Gas Station Voltage Pole
- 1.2.2 2. Chimneys Tower
- 1.2.3 3. Cargo Station Tower
- 1.2.4 4. Highway Tower
- 1.2.5 5. Voltage Pole Swamps
- 1.2.6 6. Recreation Island Tower
- 1.2.7 7. Village Tower
- 1.2.8 8. Farms Tower
- 1.2.9 9. River Tower
- 1.2.10 10. Fishermen Island Tower
Finding and unlocking these safe zones is one of the most critical progression paths in Dying Light: The Beast. Each one you activate not only provides a much-needed sanctuary from the horrors of the night but also offers valuable rewards, including a large amount of XP and, most importantly, exclusive crafting blueprints for powerful weapons and gear.
This guide will serve as your complete checklist and walkthrough for all nine of the major discoverable Safe Spots in the game. We’ll detail the unique rewards for each one and provide a general strategy for how to approach these vital locations.
The Importance of Safe Spots: Your Survival Handbook
Before we dive into the specific locations, it’s crucial to understand why prioritizing the discovery of Safe Spots is one of the smartest strategies in the game.
More Than Just a Bed
When you successfully unlock a new Safe Spot, you gain access to two essential features:
- A UV Source: This is the most critical feature. The powerful UV lights create a protective barrier that Volatiles and other powerful nighttime infected cannot penetrate. A functioning safe zone is a true sanctuary where you are completely safe from the horrors that lurk in the darkness.
- A Rest Spot: This allows you to use a bed to sleep, providing a way to safely pass the dangerous night and instantly fast-forward to morning. Resting also restores your health and serves as your new respawn point if you die in that region of the map.
The Process of Unlocking a Safe Spot
Unlocking a Safe Spot is rarely as simple as just flipping a switch. These locations are typically environmental puzzles that require you to complete a series of tasks. Based on the Dying Light formula, this usually involves clearing the immediate area of all infected, finding and starting a nearby generator (which often requires fuel), and then making your way to the main breaker to activate the UV lights. The many “Tower” locations on this list will also require you to complete a challenging parkour puzzle, forcing you to climb to the very top of the structure to activate it.
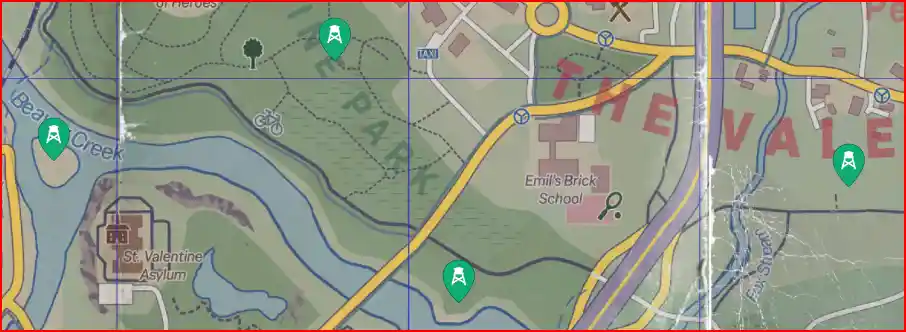
The Complete Safe Spot Location and Reward List
Here is a full list of all nine major Safe Spots, what they reward you with, and an analysis of their strategic value.
1. Gas Station Voltage Pole
- Unlocks: UV Source, Rest Spot
- Rewards: Shock Arrows Blueprint, 2,000 XP
- Strategic Analysis: The Shock Arrows Blueprint is one of the best early-game utility items you can acquire. Shock Arrows are invaluable for crowd control, capable of stunning even powerful special infected like Goons or Demolishers, giving you a crucial window to deal damage or escape. Prioritizing this Safe Spot can make your early-game encounters significantly easier.
2. Chimneys Tower
- Unlocks: UV Source, Rest Spot
- Rewards: Merc Combat Pants, Parkour Trophy Blueprint, 2,000 XP
- Strategic Analysis: This tower is a fantastic source of gear for the Mercenary (Merc) armor set, a high-quality outfit focused on combat prowess. It also provides the Parkour Trophy Blueprint, which is likely a key component for crafting a special item or completing a side quest for one of the game’s factions.
3. Cargo Station Tower
- Unlocks: UV Source, Rest Spot
- Rewards: Bleeding Knife Blueprint, 2,000 XP
- Strategic Analysis: The Bleeding Knife Blueprint is a must-have for any player who prefers a fast, agile combat style. Weapons crafted with this blueprint will inflict a powerful bleed effect, causing enemies to take significant damage-over-time after you strike them. This is extremely effective against tougher enemies with large health pools.
4. Highway Tower
- Unlocks: UV Source, Rest Spot
- Rewards: Merc Boots, 2,000 XP
- Strategic Analysis: Another crucial location for players looking to complete the Mercenary armor set. The Merc Boots will provide a significant defensive boost and likely come with a valuable combat-oriented perk.
5. Voltage Pole Swamps
- Unlocks: UV Source, Rest Spot
- Rewards: Shock Knife Blueprint, 2,000 XP
- Strategic Analysis: Similar to Shock Arrows, the Shock Knife Blueprint allows you to imbue your melee attacks with a powerful electrical charge. This is another excellent tool for stunning enemies, interrupting their attacks, and leaving them vulnerable to follow-up strikes from you or your co-op partners.
6. Recreation Island Tower
- Unlocks: UV Source, Rest Spot
- Rewards: Merc Fingerless Gloves, 2,000 XP, Treasure Map D2
- Strategic Analysis: This is a high-value location that offers multiple rewards. In addition to another piece of the Mercenary armor set, you are also rewarded with Treasure Map D2. This item will begin a separate and lucrative treasure hunt, leading you to a hidden cache of valuable loot elsewhere in the world, making this tower a top priority for any treasure hunter.
7. Village Tower
- Unlocks: UV Source, Rest Spot
- Rewards: Merc Shooting Arm Guard, 2,000 XP
- Strategic Analysis: This location provides another key piece of the Mercenary armor set. The Shooting Arm Guard will likely provide a bonus that enhances your ranged combat abilities, such as reduced recoil or faster aiming speed.
8. Farms Tower
- Unlocks: UV Source, Rest Spot
- Rewards: Fire Bolts Blueprint, 2,000 XP
- Strategic Analysis: For players who prefer using the crossbow, the Fire Bolts Blueprint is an essential find. Similar to Fire Arrows, Fire Bolts are fantastic for crowd control and dealing damage-over-time, making them one of the most versatile ammo types in the game.
9. River Tower
Unlocks:
- UV Source
- Rest Spot
Rewards:
- Exploding Knife Blueprint
- 2,000 XP
10. Fishermen Island Tower
- Unlocks: UV Source, Rest Spot
- Rewards: Merc Long Sleeve Shirt, 2,000 XP
- Strategic Analysis: The final piece of the puzzle for gear collectors. This tower rewards you with the chest piece for the powerful Mercenary armor set. Systematically finding and clearing all the towers that reward Merc gear is a great way to assemble a full set of high-tier armor early in your adventure.
By systematically finding and unlocking all of these Safe Spots, you will not only make the world of Castor Woods a safer place to be but also amass a powerful collection of blueprints and gear that will be essential for your survival. Good night, and good luck.
- Dying Light: The Beast – How to Boost Performance (Epic Games)
- Dying Light: The Beast – How to Unlock the Crossbow and Shotgun
- Dying Light: The Beast – How to Find the Secret ‘Last Hand of Glova’ Blueprint
- Dying Light: The Beast – The Ultimate Advanced Graphics Guide
- Dying Light: The Beast – A Complete Guide to All Safe Locations and Codes (Old Town)
- Dying Light: The Beast – A Complete Guide to All Blueprint Locations
- Dying Light: The Beast – A Complete Walkthrough for the ‘Safe Haven’ Quest