As you explore the dense, post-apocalyptic world of Castor Woods in Dying Light: The Beast, you’ll quickly learn that the most valuable loot is rarely left out in the open. The landscape is dotted with intricate environmental puzzles that will test your wits, your combat skills, and your preparation, rewarding the most dedicated survivors with high-tier weapons and gear.
Table of Contents
- 1.1 Preparation: What to Bring to the Bridge
- 1.1.1 Essential Tools
- 1.1.2 Recommended Combat Loadout
- 1.1.3 When to Attempt the Puzzle
- 1.2 The Bridge Puzzle: A Step-by-Step Walkthrough
- 1.2.1 Step 1: Locate the Green Train Car
- 1.2.2 Step 2: The First Lockpick and the Initial Clue
- 1.2.3 Step 3: Finding the Keycard
- 1.2.4 Step 4: Finding the Power Source
- 1.2.5 Step 5: The Ambush! Defending the Generator
- 1.2.6 Step 6: Connecting the Power
- 1.2.7 Step 7: Claiming Your Reward
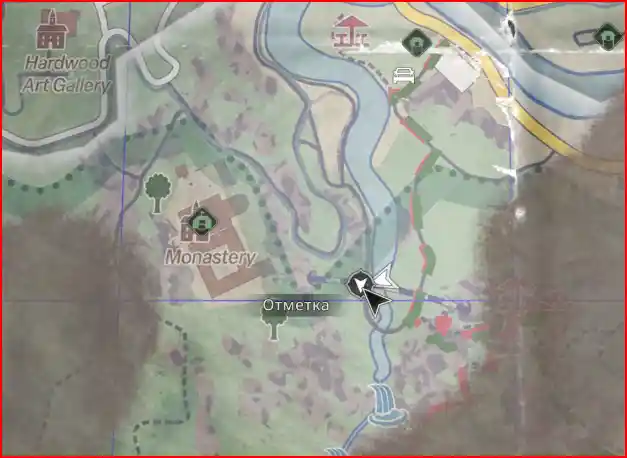
One of the most rewarding of these puzzles is the locked green train car found on the massive, derelict bridge near Olivia’s monastery.
Getting inside this car is not a simple matter of lockpicking. It is a multi-stage quest that will have you searching for a hidden keycard, restoring power to a dead electronic lock, and defending yourself against a ferocious horde of infected attracted by your efforts. This guide is your complete, step-by-step walkthrough for solving the entire bridge train car puzzle. We will cover the essential tools you’ll need, the exact sequence of actions to follow, and provide expert strategies for dealing with the inevitable zombie ambush, ensuring you can claim the valuable yellow case waiting inside.
Preparation: What to Bring to the Bridge
This is a mid-game puzzle that requires a fair amount of preparation. Venturing onto the bridge without the right gear will likely result in a frustrating and untimely death. Before you attempt this challenge, it’s highly recommended that you craft and equip the following:
Essential Tools
- Lockpicks: This is non-negotiable. You will need to lockpick two separate doors to complete this puzzle. Make sure you have at least a handful of durable lockpicks in your inventory before you start.
Recommended Combat Loadout
You will be facing both lone, tough enemies in close quarters and a full-blown horde in the open. A balanced loadout is key.
- Melee Weapon: Bring a powerful and durable melee weapon with some good mods attached. A modded axe, sledgehammer, or longsword is ideal for dealing with the tough biter inside one of the train cars and for crowd-controlling the horde.
- Ranged Weapon: A silenced firearm or a bow can be extremely useful for picking off any wandering zombies on the bridge before you start the puzzle, minimizing the number of enemies you have to fight during the final ambush.
- Consumables: A full stack of Medkits is essential, as the generator defense phase can be intense and will likely leave you with some damage. Crafting and bringing along some stamina and damage-boosting consumables is also a fantastic idea to give you an edge during the fight.
When to Attempt the Puzzle
It is strongly advised that you attempt this puzzle during the in-game day. The final step of the puzzle involves starting a loud generator, which will attract a significant number of zombies. Starting this noisy process at night would be incredibly dangerous, as it would almost certainly attract a swarm of hyper-aggressive Volatiles in addition to the normal infected, making the defense phase nearly impossible.
The Bridge Puzzle: A Step-by-Step Walkthrough
Once you are fully prepared, it’s time to head to the bridge and claim your prize. Follow these steps in order to solve the puzzle.
Step 1: Locate the Green Train Car
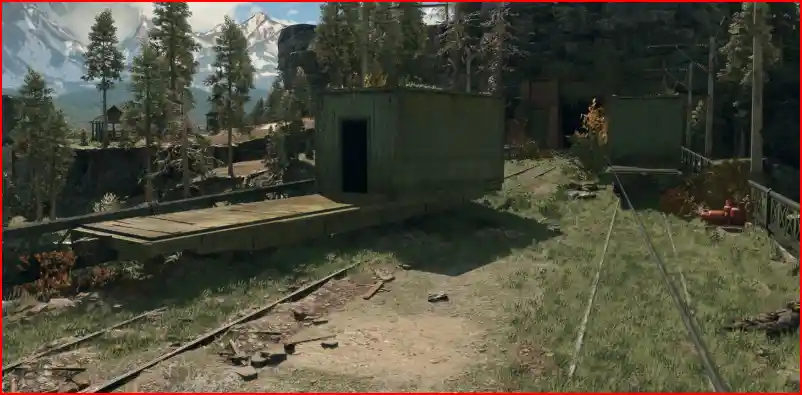
Your first objective is to find the target. Make your way onto the large, broken bridge that is located near the Monastery, the safe zone where the main story character Olivia resides. On the bridge, you will find several derailed train cars. The one you are looking for is a specific green-colored passenger car.
Step 2: The First Lockpick and the Initial Clue
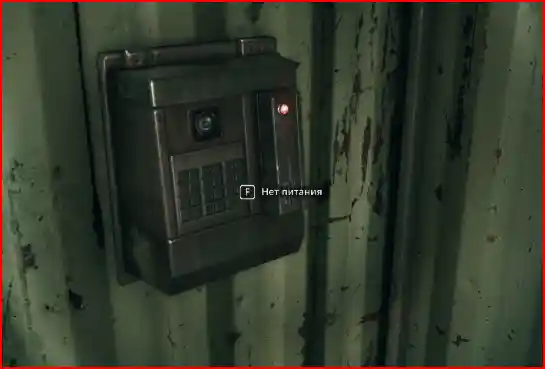
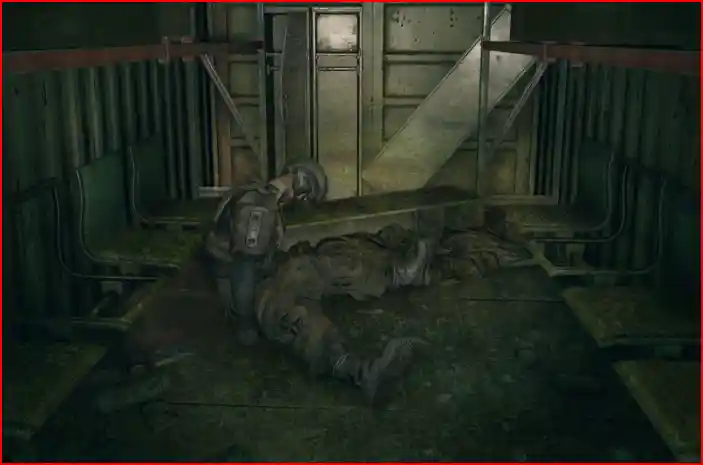
Approach the door of the green car and use one of your lockpicks to get inside. Be prepared for a fight as soon as the door opens, as there is a biter waiting for you. After you’ve dealt with it, you will find your path forward is blocked by a second, electronically sealed door. Interacting with it will reveal that you need two things to open it: power and a keycard. This is your main objective.
Step 3: Finding the Keycard
Exit the green car and turn around 180 degrees. You will see two other accessible train cars nearby. You need to head to the one on the left. This car is also locked, so you will need to use another lockpick on its door.
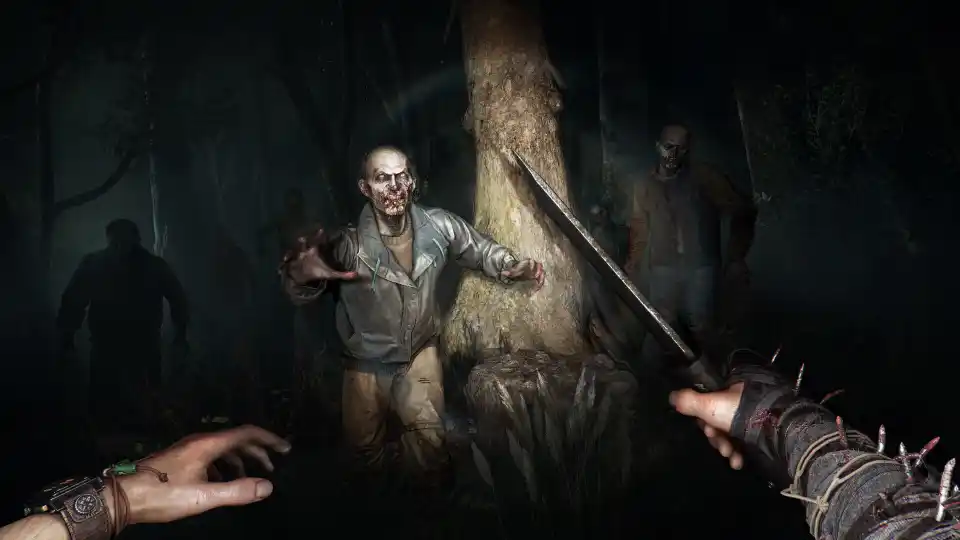
Be ready for another fight. Inside this car is a much tougher, more durable biter, described by players as wearing heavy gear. This enemy will take more hits to kill than a standard zombie. You must defeat this tough biter. Once it is dead, you will be able to loot the required keycard from its body.
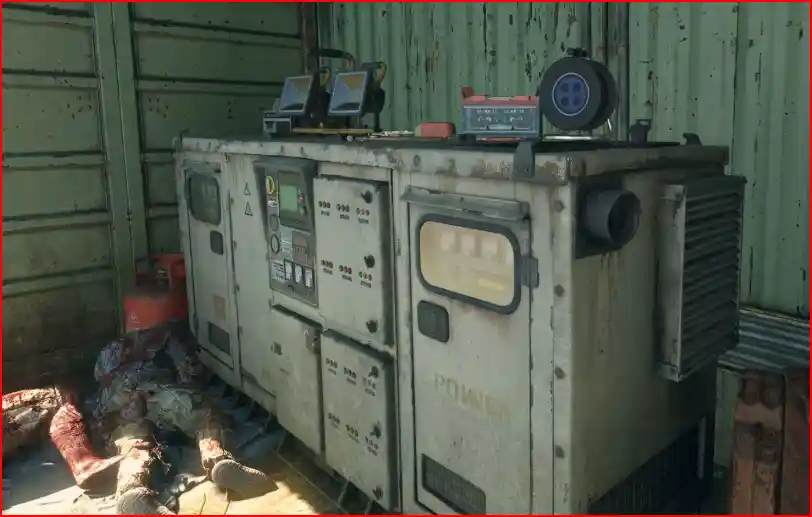
Step 4: Finding the Power Source
With the keycard now in your inventory, it’s time to find the power. Head to the final accessible train car (the one on the right from your starting perspective). Inside this car, you will find a portable generator with a long power cable attached to it.
Step 5: The Ambush! Defending the Generator
This is the climactic and most dangerous part of the puzzle. When you interact with and start the generator, it will roar to life, and its loud noise will immediately begin to attract a horde of infected from all over the bridge. You must now defend the generator and yourself from several waves of fast-moving Virals and at least one heavy brute-type zombie.
Use your best combat skills and the environment to your advantage. The narrow confines of the bridge are perfect for using a powerful kick to send zombies flying over the edge to their doom. Stay mobile, use your most powerful weapons, and focus on taking down the fast-moving Virals first before they can overwhelm you.
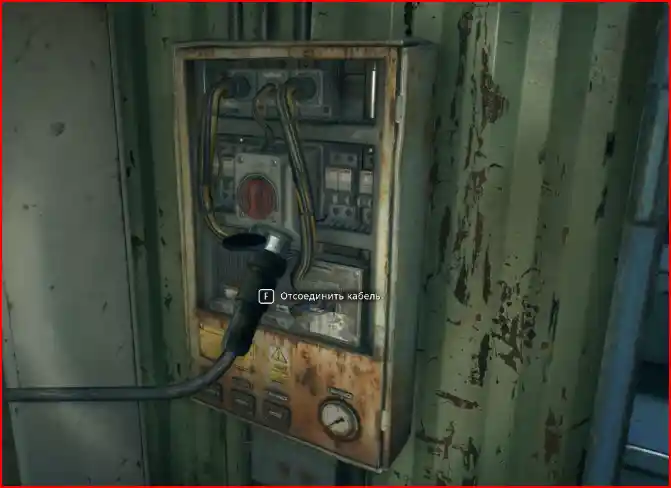
Step 6: Connecting the Power

Once you have successfully fought off the horde and the area is clear, your next step is to get the power to the locked door. Grab the end of the power cable from the generator car and drag it all the way back to the original green train car. You will see a power socket on the exterior of the car, next to the electronic door. Plug the cable in.
Step 7: Claiming Your Reward
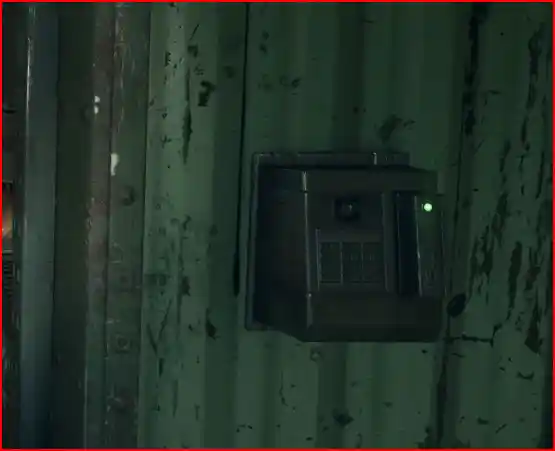
With the electronic lock now powered, you can use the keycard you looted earlier on the adjacent scanner. You will hear the lock disengage, and the final door will slide open. Inside, you will find the valuable yellow case. Open it to claim your high-tier loot.
This puzzle is a perfect example of the rewarding environmental storytelling and multi-step challenges that await you in Dying Light: The Beast. By coming prepared and following these steps, you can conquer this challenge and claim the valuable loot inside. Good night, and good luck.
By MXCHXVXZXR
- Dying Light: The Beast – A Spoiler-Free Guide to the Main Story Achievements
- Dying Light: The Beast – The Full Story of Kyle Crane
- Dying Light: The Beast – A Complete Guide and Roadmap to All 31 Achievements
- Dying Light: The Beast – All Active Docket Codes for Free Weapons and Gear (September 2025)
- Dying Light: The Beast – Review: What is New?