In the brutal, zombie-infested wilderness of Castor Woods, your survival often depends on the firepower you carry. While you’ll spend countless hours crafting and modifying a vast arsenal of melee weapons, two specific firearms stand above the rest as true game-changing tools of destruction: the silent and endlessly reusable Hunting Crossbow and the loud, room-clearing, and devastatingly powerful Shotgun.
Table of Contents
- 1.1 The Silent Killer: How to Unlock the Hunting Crossbow
- 1.1.1 Why You Need the Crossbow: Its “Overpowered” Perks
- 1.1.2 The Prerequisite: Unlocking the “Hunting Yaga” Quest
- 1.1.3 “Hunting Yaga” Quest Walkthrough and Strategy
- 1.2 The Loud Solution: Three Ways to Get the Shotgun
- 1.2.1 Method 1: The Guaranteed Story Reward (Recommended)
- 1.2.2 Method 2: Looting from High-Tier Enemies
- 1.2.3 Method 3: The Early-Game Gamble (Military Convoys)
These “overpowered” (OP) weapons are not found through random luck; they are special rewards that must be unlocked through specific quests, looted from formidable enemies, or discovered as a rare prize.
This guide is your complete, step-by-step walkthrough for acquiring both of these essential weapons. We will cover the necessary prerequisites, provide a detailed strategy for the challenging quests, and break down the different paths you can take to add these top-tier firearms to your arsenal.
The Silent Killer: How to Unlock the Hunting Crossbow
The Hunting Crossbow is arguably the best and most versatile weapon in the entire game. It is an endgame weapon that rewards players who undertake one of the most challenging side quests.
Why You Need the Crossbow: Its “Overpowered” Perks
Before we get into the “how,” it’s important to understand why this weapon is so sought after. The Hunting Crossbow, affectionately named “Lizzy” by its previous owner, comes with a set of incredible perks that make it a must-have for any survivor:
- No Durability: The crossbow never breaks. Unlike every other weapon in the game, it does not have a durability bar, meaning you will never have to spend resources repairing it.
- Extreme Power: It is incredibly powerful, capable of killing most common infected in a single headshot and larger enemies in just a few shots.
- Reusable Ammo: Standard bolts that you fire can be retrieved from enemy corpses or the environment, meaning you can often complete entire encounters without losing a single piece of ammo.
- Cheap Crafting: Crafting a new batch of 4 standard bolts only costs 12 Scrap and 2 Feathers, making it one of the most resource-efficient weapons in the game.
- Elemental Upgrades: You can unlock blueprints for special bolt types, like Fire and Shock bolts, by clearing various Safe Zones, adding immense tactical versatility to your arsenal.
The Prerequisite: Unlocking the “Hunting Yaga” Quest
You cannot simply stumble upon this quest. It has a specific unlock requirement.
- First, you must explore the National Park region of the map until you discover the Abandoned House Safe Zone.
- You must then successfully clear this location of infected and activate it as a safe zone.
- After the safe zone is unlocked, the next time you return to your main hideout or base (like the Monastery), a new quest-giving NPC named Max will be present.
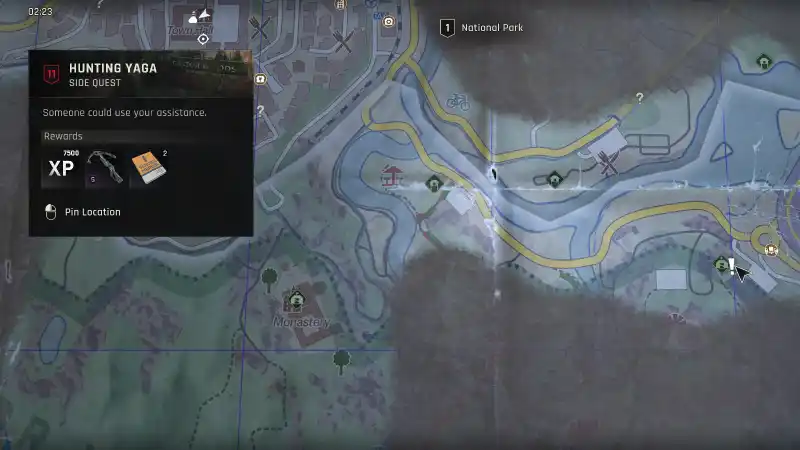
- Speak to Max to begin the difficult, Level 11 side quest, “Hunting Yaga.”
“Hunting Yaga” Quest Walkthrough and Strategy
This mission is one of the most challenging side quests in the game, so come prepared. Max will task you with hunting a mysterious and dangerous target known as a “Yaga” in a remote section of the forest. The entire mission takes place at night.
- The Golden Rule: STAY QUIET! This is the most important tip for this quest. The forest is teeming with Volatiles, and the sound of un-silenced gunfire will immediately attract a massive and likely un-survivable swarm of these deadly alpha infected. Your key to survival is stealth.
- The Gauntlet: Your path to the Yaga’s lair will be guarded by waves of hostile human enemies. You must use your stealth takedown skills and powerful, silent melee weapons to eliminate them without making too much noise. Avoid using firearms at all costs.
- The Miniboss: The “Yaga” itself is a formidable miniboss that will test your combat skills. It is a fast and aggressive enemy. Use your dodge ability, look for openings after its attacks, and be prepared for a long and intense fight.
- The Reward: Once you have defeated the Yaga and returned to Max, he will reward you with the legendary crossbow, “Lizzy.”
The Loud Solution: Three Ways to Get the Shotgun
If stealth isn’t your style and you prefer a more explosive solution to your problems, then you need a Shotgun. There are three distinct methods for acquiring this powerful weapon.
Method 1: The Guaranteed Story Reward (Recommended)
This is the easiest and most reliable way to get your first Shotgun.
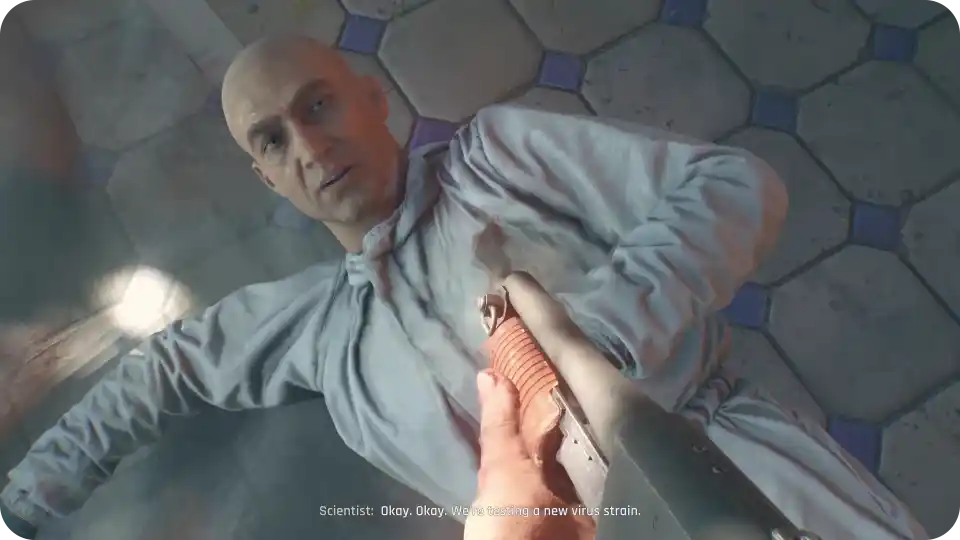
- Mission: Progress through the main story until you reach the 6th of the 17 story missions, titled “A New Strain.”
- How to Get It: During a mid-mission cutscene in “A New Strain,” your character, Kyle Crane, will disarm a scientist and take his shotgun. From this point forward, the shotgun is permanently added to your inventory, and the blueprint to craft more becomes available.
Method 2: Looting from High-Tier Enemies
If you want to acquire more shotguns or find one with better stats, you can loot them from specific enemies, but only after a certain point in the story.
- Prerequisite: You must first complete the 5th story mission, “Power Gambit.”
- How to Get It: After this mission is complete, the human enemy factions in the Castor Woods region will become better armed. You will start encountering heavy-type human enemies who are carrying shotguns. You can defeat these powerful enemies and loot the shotgun directly from their bodies.
Method 3: The Early-Game Gamble (Military Convoys)
For players who are feeling lucky and want to get their hands on a powerful weapon much earlier than the story intends, there is a third option.
- Location: Look for abandoned Military Convoys on the highways and roads of Castor Woods. These are high-tier loot locations that are often guarded by a large number of infected.
- How to Get It: After clearing out the zombies, you can lockpick the back of the military trucks to find several large chests. There is a small, random chance for a shotgun and its ammunition to spawn in one of these chests. This method is available from the very beginning of the game, but it is entirely dependent on luck.
By RalfekS
- Dying Light: The Beast – How to Boost Performance (Epic Games)
- Dying Light: The Beast – How to Find the Secret ‘Last Hand of Glova’ Blueprint
- Dying Light: The Beast – A Complete Guide to All Safe Spot Locations and Rewards
- Dying Light: The Beast – The Ultimate Advanced Graphics Guide
- Dying Light: The Beast – A Complete Guide to All Safe Locations and Codes (Old Town)
- Dying Light: The Beast – A Complete Guide to All Blueprint Locations
- Dying Light: The Beast – A Complete Walkthrough for the ‘Safe Haven’ Quest