
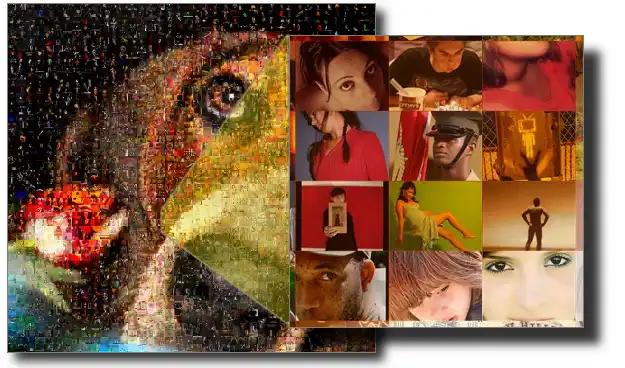
I’ve always been fascinated by photo mosaics—large images composed of hundreds or even thousands of smaller pictures. From a distance, you see the main scene, but up close, you discover the individual photos that make it up, each telling its own story. I wanted to turn my own collection of vacation photos into a unique piece of visual art, and I found the perfect tool to do it: Foto-Mosaik-Edda (FMEdda).
Table of Contents
This software is surprisingly effective and intuitive, guiding you step-by-step through the creation process, even if you have no graphic design experience. While the free version offers the ‘Classic’ mosaic style, there’s a Pro version that unlocks more creative styles without watermarks.
The result is something deeply personal and perfect for printing and framing. Let’s walk through how I create my own photo mosaics.
🗃️ Step 1: Create an Image Database
The foundation of any good photo mosaic is a large collection of smaller images. The first and most important step in FMEdda is to create a database of these ’tile’ photos. I start by clicking on ‘Create/Modify database’ from the main menu.
The software then guides me through the process:
- I select ‘Add photos’ and give my new database a name.
- Next, I point the program to the folder on my computer that contains all the photos I want to use for the tiles. I find it’s best to create a dedicated folder with a good number of images beforehand.
- I make sure to check the box ‘Synchronize found images with the database’ and then click ‘Start’ to let the program analyze and add all the photos.
🎨 Step 2: Choose Your Main Image and Style
Once my database is ready, I return to the main menu and click ‘Create mosaic’. For this guide, I’m using the ‘Classic mosaic style’. The next step is to select the main image—the one that will be recreated using the smaller tiles. I click ‘Open’ and choose my primary photo, for instance, a picture of a heart.
The program then asks me to select the database of tile images I created in the first step. After that, I click ‘Next’ to move on to the configuration options. For those who enjoy digital art, creating an AI image summarizer with Python could be another fun project.
🔧 Step 3: Configure the Mosaic Options
This is where I get to define the final look of my mosaic. The ‘Mosaic options’ screen lets me control the format, resolution, and number of tiles.
Here are the key settings I adjust:
- Paper Format: I select the desired print format, such as 30x40cm. This helps the software calculate the right proportions.
- Resolution: I set this to at least 150 PPI (Pixels Per Inch) for a sharp print result.
- Number of tiles: This determines how many small photos will make up the final image. A higher number leads to more detail but requires a larger photo database.
- Tile Format: I can choose whether the tiles are landscape, portrait, or square.
After tweaking these settings, I click ‘Start’ and let the software work its magic. In just a few moments, my stunning photo mosaic is complete and ready to be admired. For more creative projects, you might also be interested in learning how to create AI-generated images.
More Topics
- Windows 11 – How to Monitor Your PC’s RAM
- Motorola Razr 60 – A Guide to the New Foldable with Moto AI
- Lenovo ThinkCentre Neo 50a – A Guide to the All-in-One PC
- Amazon Fire TV Stick – How Piracy and Sideloading Are Being Blocked
- Ring Cams – How to Use the New ‘Video Descriptions’ AI Feature
- How to Turn a Travel Itinerary into an Animated Map Video
- Nothing Phone 3 – A Guide to Specs, Features, and Price