
I think it has happened to almost everyone at some point: an important file that won’t open, a corrupted ZIP archive, or a USB drive that suddenly becomes unreadable. The feeling of frustration and helplessness when you can’t access your own data is all too familiar. But the good news is that, in many cases, not all is lost.
Table of Contents
There are perfectly legitimate tools and techniques that can help you recover files after an accidental deletion, repair damaged sectors, or restore access to your documents. In this guide, I’ll walk you through how I use a powerful and effective tool, Rcysoft Data Recovery Ultimate Free, to tackle these common situations. This tool is designed for simple data recovery, even from RAW partitions or after a system crash.
Remember, the goal here is to provide solutions for recovering your own data due to technical or accidental issues, not to access content that doesn’t belong to you.
🔍 Starting the Scan
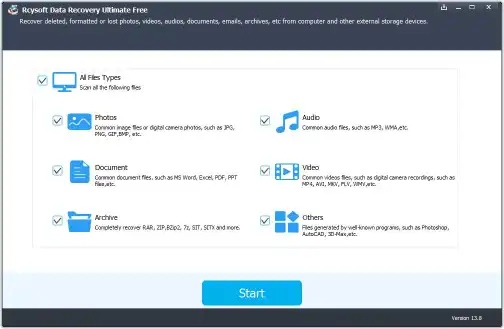
The first step is to launch the recovery tool. After installing and running Rcysoft Data Recovery, I’m presented with a straightforward choice. I can either scan for specific file types—like documents, photos, or videos—or I can select ‘All files’ to perform a comprehensive search for anything that can be recovered.
After making my selection and clicking ‘Start’, the next screen asks me to choose the drive or device I want to scan. Once I’ve selected the correct drive, I click ‘Start Scan’ to begin the search process.
The duration of the scan depends on the size of the drive; a larger disk will naturally take more time to analyze. When it’s finished, the program displays a complete list of all the files it has found and deems recoverable.
📂 Previewing and Recovering Your Files
Once the scan is complete, the results are organized by file type in a sidebar on the left. I find this incredibly helpful. The number of files found in each category is shown in parentheses, so I can quickly navigate to the section I need.
Clicking on a category displays all the corresponding files it found. Before recovering, I can often preview the files to make sure they are the correct ones. This is a crucial step to avoid recovering corrupted or irrelevant data. After selecting the files I want to restore, I simply click the ‘Recover’ button.
For those interested in more advanced file management, learning how to work with files in Python can open up a world of automation possibilities.
💾 Where to Save the Recovered Data
This is one of the most important rules of data recovery. The software will prompt me to choose a destination to save the recovered files. A critical warning will appear, advising me not to save the files onto the same drive from which they were recovered.
I always follow this advice strictly. Saving recovered data back to the source drive can overwrite the very files you are trying to restore, leading to permanent data loss. I make sure to save them to a different drive, like an external hard disk or another internal partition.
After confirming the destination, the recovery process begins, and soon my lost files are back and accessible. If you often deal with system issues, it’s also a good idea to know how to back up and restore your system to prevent future data loss.
More Topics
- Windows 11 – How to Monitor Your PC’s RAM
- Motorola Razr 60 – A Guide to the New Foldable with Moto AI
- Lenovo ThinkCentre Neo 50a – A Guide to the All-in-One PC
- Amazon Fire TV Stick – How Piracy and Sideloading Are Being Blocked
- Ring Cams – How to Use the New ‘Video Descriptions’ AI Feature
- How to Turn a Travel Itinerary into an Animated Map Video
- Nothing Phone 3 – A Guide to Specs, Features, and Price