Navigating the windy, platform-heavy cliffs of the Blasted Steps can be a disorienting challenge. Without a map, it’s easy to get lost. Fortunately, the trusty cartographer is here to help, but finding him requires a complex journey through the area’s most dangerous ledges.
Table of Contents
This guide provides the exact route from Shellwood to the cartographer’s perch, ensuring you can fill in the blanks on your map and explore the Blasted Steps with confidence.
Prerequisites: The Cling Grip Ability
Before you can even attempt this journey, you must have acquired a key movement skill:
- Required Ability: Cling Grip. This ability allows Hornet to cling to and jump off specific walls, which is essential for the vertical ascent into the Blasted Steps from Shellwood.
- How to Get It: This is a core ability unlocked by progressing through the main story, typically found in one of the early-game areas like Bonebottom or the Moss Grotto.
Step-by-Step: The Path to the Cartographer
Follow these instructions carefully. The path is linear but requires precise platforming.
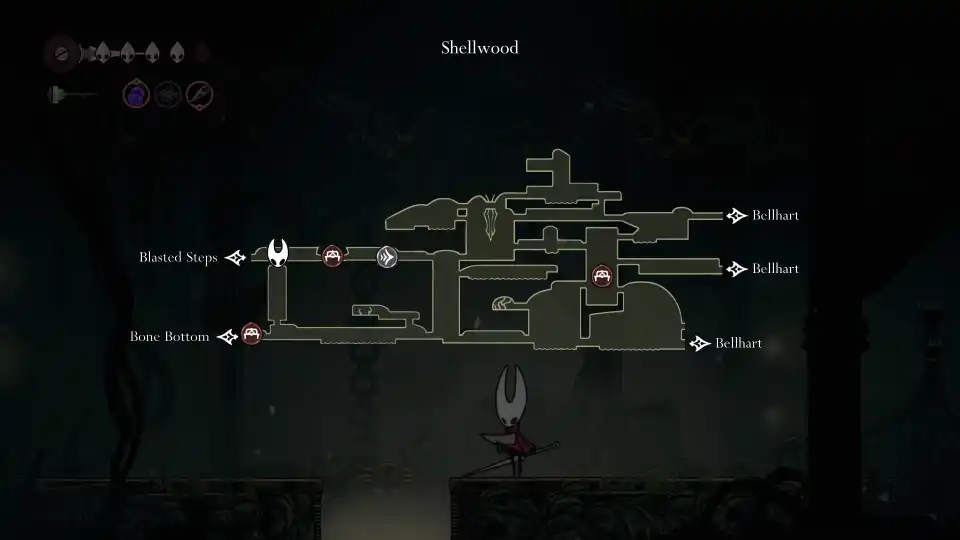
- Enter from Shellwood: Your journey begins in the top-left section of Shellwood. Use your Cling Grip to climb the tall walls there, ascending into the Blasted Steps zone.
- The Initial Wall Jump:
- Once in the Blasted Steps, head all the way to the left.
- You will find a specific platform with a wall on its left side. Use a series of wall jumps to ascend this shaft and reach the higher pathway.
- Traverse the Main Path:
- At the top, proceed to the right, carefully avoiding spikes.
- Then, head left and upwards until you find your first Resting Bench in the area. This is a crucial checkpoint.
- The Windy Gauntlet:
- From the bench, head left. You will face a series of small, isolated platforms over a large gap.
- Use your glider (the Silkborne Spinner) to safely cross between them. The wind can push you, so make controlled, short glides.
- On the far side, use Cling Grip on the walls to climb up to the next section.
- Avoid the Enemies:
- You will encounter leaping enemies. The strategy is to run past them or go underneath their jump arcs. Do not stop to fight unless necessary; your goal is to reach the map.
- Continue sprinting to the left, using downward attacks to bounce off spiked platforms and avoid hazards.
- The Final Leap:
- The path eventually forces you to the right. From the last safe platform, you must make a long jump to the right across a massive gap.
- Listen carefully: If you can hear the cartographer’s characteristic humming or singing, you are on the right track.
- Claim Your Map:
- Land safely on the platform on the right-hand side. Be mindful of the wind affecting your glide.
- Here, you will finally find the cartographer NPC. Speak with him to purchase the Blasted Steps map.

With the map in hand, you can now explore the entirety of the Blasted Steps without fear of getting lost, allowing you to find every hidden item, quest, and secret this challenging zone has to offer.
- Hollow Knight: Silksong – How to Beat The Giant Mole Boss (Secret Beast Shard Guide)
- Hollow Knight: Silksong – How to Unlock the Pogo Jump
- Hollow Knight: Silksong – How to Beat The Final Boss (Grand Mother Silk Guide)
- Hollow Knight: Silksong – How to Beat Great Conch Flies Boss
- Hollow Knight: Silksong – How to Beat Moore Wing Boss
- Hollow Knight: Silksong – How to Beat The Widow (Phase 1 & 2 Strategy Guide)
- Hollow Knight: Silksong – How to Beat Savage Beastfly Boss (Easily)