Can’t find the Blasted Steps map? Our guide shows the exact path to find Shakra and buy the map in Hollow Knight: Silksong, plus his permanent location if you miss him.
Table of Contents
How to Get the Blasted Steps Map (Shakra Location)
Navigating the ashen wastes of the Blasted Steps without a map is a surefire way to get lost. This guide provides the step-by-step route to find the cartographer, Shakra, and purchase his map for the area, ensuring you can explore every hidden corner with confidence.
The Path to Shakra in the Blasted Steps
The journey to find Shakra begins right after the Shellwood area. You do not necessarily need the Double Jump, but the Glide ability is essential for crossing the larger gaps.
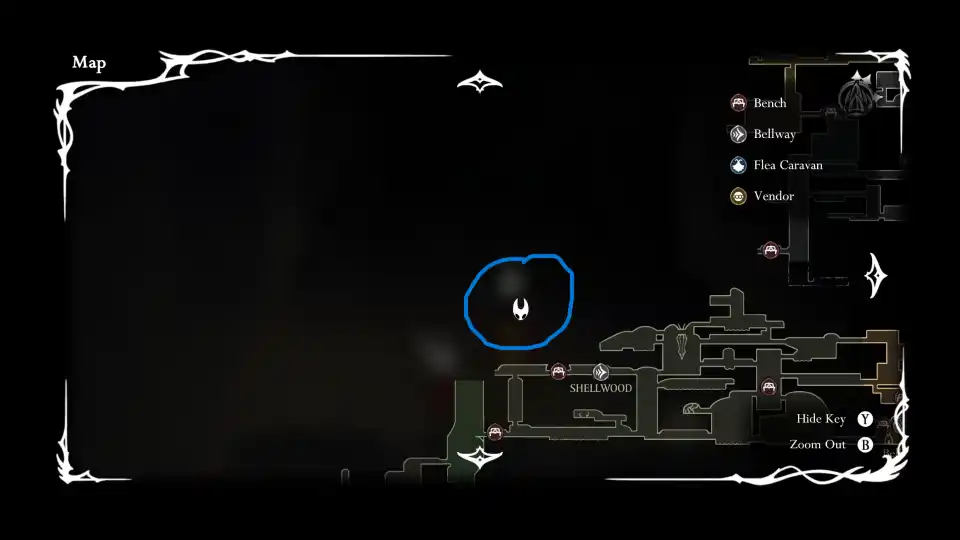
- Starting Point: Enter the Blasted Steps from the Shellwood exit. You will emerge in the starting area shown in the guide.
- Initial Traversal: From the start, head left across a gap. Continue leftward, navigating the platforms until you can jump up to a higher ledge.
- Through the Tunnel: You will enter a tunnel system. Work your way through it, eventually coming out on the other side where you will find a Resting Bench. You can use Rosaries to unlock this bench for future use.
- The Glide Challenges: After the bench, the path requires precise gliding:
- Head right from the bench and navigate across a series of platforms. You will encounter an enemy; you can choose to fight it, jump over it, or simply run past it and take a hit.
- The key section involves a long gap that requires a well-timed glide to cross. While the guide’s author used Double Jump, this gap is designed to be cleared with the Glide ability alone.
- You can also use the hanging bells in the area to bounce across if you prefer.
- Final Approach: After passing the enemy and crossing the gap, head upwards and to the right into a new chamber. Here, you will see the first signs of chakra (likely environmental storytelling or visual cues).
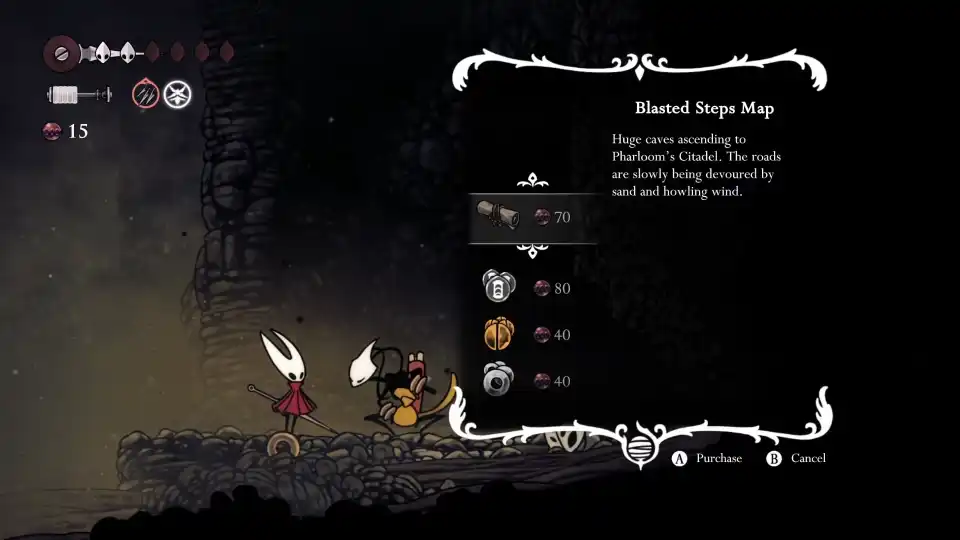
- Find Shakra: A final glide across a gap will bring you to a platform where Shakra is located. Talk to him and purchase the Blasted Steps map using Rosaries.
What to Do If Shakra is Not There
If you’ve already progressed through the Blasted Steps and returned to find Shakra gone, don’t panic. He has a permanent, secondary location where you can always find him.
- Go to Bellheart: Travel to the area known as Bellheart.
- Head to the Top: Make your way to the very top of the main room in Bellheart.
- Glide to the Right: From the top, glide to the right-hand side of the room.
- His Shop: Shakra will have set up his cart here in this alcove. You can purchase the Blasted Steps map from him at this location retroactively.
Pro Tips for the Journey
- Glide is Mandatory: Ensure you have the Glide ability before attempting this route. Without it, you will not be able to cross the necessary gaps.
- Bench First: Unlocking the resting bench along the path is a good idea. It creates a convenient checkpoint if you fail the platforming sections or need to retry.
- Don’t Fight Everything: The platforming can be tricky. It’s often faster and safer to simply avoid enemies rather than engage them on narrow ledges.
Now that you have the map, the treacherous paths and secrets of the Blasted Steps are yours to uncover. Happy exploring
- Hollow Knight: Silksong – How to Beat Raging Conchfly (Easy Solo Boss Guide)
- Hollow Knight: Silksong – How to Beat The Great Conchflies (Easy Boss Guide)
- Hollow Knight: Silksong – How to Get the Sands of Karac Map (Full Shakra Guide)
- Hollow Knight: Silksong – 15 Advanced Tips & Secrets You NEED To Know
- Hollow Knight: Silksong – Cogheart Pieces Guide: Find All 3 & Fix the Automaton
- Hollow Knight: Silksong – How to Find the Key of Apostate
- Hollow Knight: Silksong – How to Unlock Fast Travel