
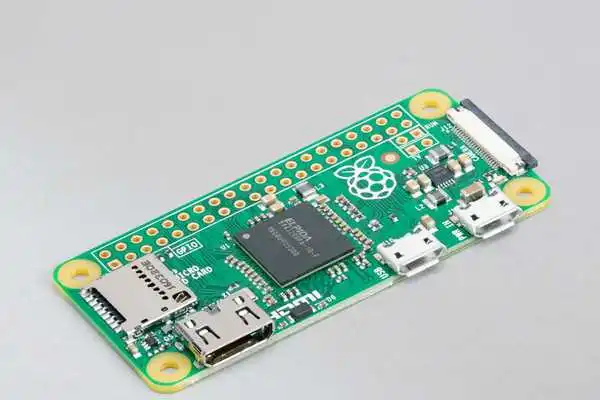
Physical computing bridges the gap between the digital and physical worlds. It’s about creating interactive devices that use sensors to perceive their environment and actuators to respond to it. The Raspberry Pi, a small and affordable single-board computer, is the perfect brain for these projects, offering a powerful Linux environment and accessible hardware pins for connecting electronics.
Table of Contents
This guide will walk you through the essential steps to build your own physical computing project, from gathering components to programming interactions and expanding functionality. Let’s create a device that can sense and react to its surroundings.
🧭 How to Gather Your Components
Before you can build, you need the right tools. A basic physical computing project requires the core computer, inputs (sensors), and outputs (actuators). Having the correct components on hand will make the process smooth and enjoyable.
Here is a table of essential and recommended parts:
| Component | Purpose | Examples & Notes |
| Raspberry Pi | The central processing unit of your project. | A Raspberry Pi 4 Model B is recommended for its power and features. |
| Power Supply | Provides stable power to the Pi. | Use the official USB-C power supply (5V, 3A) to avoid stability issues. |
| MicroSD Card | Acts as the hard drive for the operating system and your code. | A 16GB or 32GB Class 10 card is sufficient for most projects. |
| Breadboard | A solderless board for prototyping circuits. | A half-size or full-size breadboard is ideal for beginners. |
| Jumper Wires | Connect components on the breadboard to the Pi’s GPIO pins. | Get a pack of male-to-male, male-to-female, and female-to-female wires. |
| Sensors (Inputs) | Allow your project to “see,” “hear,” or “feel” its environment. | DHT22 (temperature/humidity), PIR (motion), photoresistor (light). |
| Actuators (Outputs) | Allow your project to create a physical response. | LEDs (visual feedback), buzzers (sound), relays (to control high-power devices). |
⚙️ How to Connect and Program Your Device
With your components gathered, it’s time to bring your project to life. This involves wiring the hardware to the Pi’s General Purpose Input/Output (GPIO) pins and writing a Python script to control them.
Step 1: Wire the Circuit
The GPIO pins are the interface between your Raspberry Pi and the physical world. For this example, we’ll connect a DHT22 temperature and humidity sensor.
- Safety First: Make sure your Raspberry Pi is turned off and unplugged before connecting any wires.
- Connect Power: Use jumper wires to connect the sensor’s power (VCC) pin to a 3.3V pin on the Pi and the ground (GND) pin to a ground pin.
- Connect Data: Connect the sensor’s data pin to a specific GPIO pin, for example,
GPIO 4.
Step 2: Write the Python Code
Python is the most common language for Raspberry Pi projects due to its simplicity and extensive library support. We will use a library from Adafruit to easily read from the DHT sensor.
First, install the necessary library by opening the terminal on your Raspberry Pi and running:
<pre><code>pip install adafruit-circuitpython-dht </code></pre>
Next, create a Python file (e.g., weather_station.py) and use the following code to read and display the sensor data.
<pre><code>import time import board import adafruit_dht
— Setup —
Initialize the sensor. We’re using a DHT22 connected to GPIO 4.
The ‘board’ library helps map the pin numbers.
dht_sensor = adafruit_dht.DHT22(board.D4)
print("Starting sensor readings. Press Ctrl+C to exit.")— Main Loop —
while True:
try:

# Read data from the sensor temperature_c = dht_sensor.temperature humidity = dht_sensor.humidity
# Convert temperature to Fahrenheit
temperature_f = temperature_c * (9 / 5) + 32
# Print the readings
print(f"Temp: {temperature_c:.1f} C / {temperature_f:.1f} F | Humidity: {humidity:.1f}%")
except RuntimeError as error:
# Errors happen, just print them and continue
print(error.args[0])
time.sleep(2.0)
except Exception as error:
dht_sensor.exit()
raise error
# Wait 2 seconds before the next reading
time.sleep(2.0)
</code></pre>
To run your script, save the file and execute it from the terminal: python weather_station.py. You should see temperature and humidity readings printed every two seconds.
📌 How to Expand Functionality
A basic sensor-reading device is a great start, but the real power of the Raspberry Pi lies in its ability to connect to other systems and perform more complex tasks.
- Data Logging: Modify your script to write the sensor readings to a file. This creates a historical log you can analyze later. Appending to a CSV (Comma-Separated Values) file is a simple way to start.
- Web Dashboard: Install a lightweight web framework like Flask. You can then create a simple web page, hosted on the Pi, that displays the sensor readings in real-time. This allows you to monitor your project from your phone or any other computer on your network.
- Alerts and Notifications: Program the Pi to send you an email or a mobile notification (using services like IFTTT) when a certain threshold is crossed. For example, send an alert if the temperature in a room goes above 30°C.
- AI-Based Analysis: For more advanced projects, you can use frameworks like TensorFlow Lite to run machine learning models directly on the Pi. This could be used for tasks like detecting anomalies in sensor data or, if you add a camera, performing basic object recognition.
More Topics
- How to Compare and Choose Modern Shells Beyond Bash
- How to Organize Large Photo Collections with KPhotoAlbum
- How to Safely Automate Sysadmin Tasks with Bash Scripts
- How to Get Started with Apache OpenServerless
- How to Install and Customize Deepin 25
- How to Create AI-Generated Images That Match Your Vision
- How to Design Logical Puzzles to Test AI Reasoning