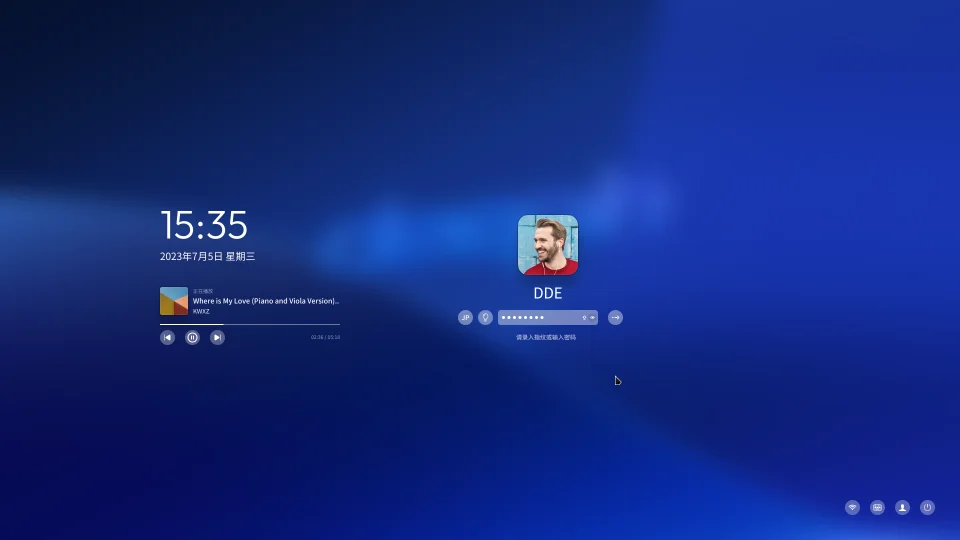
Deepin has long been celebrated in the Linux community for its stunning design and focus on user experience. With the release of Deepin 25, the distribution takes another leap forward, offering a refined desktop environment, improved performance, and an innovative approach to application management. It’s an ideal choice for anyone—from Linux newcomers to seasoned veterans—seeking a desktop that is both beautiful and functional right out of the box.
Table of Contents
This guide will walk you through the entire process, from preparing for the installation to personalizing your new desktop and populating it with essential applications.
Pre-Installation Checklist
Before you begin, a little preparation will ensure a smooth and successful installation.
- Check System Requirements: Ensure your hardware is ready for Deepin 25.
- Download the ISO: Get the official Deepin 25 disk image from the Deepin website.
- Create a Bootable USB: Use a tool like Balena Etcher or Ventoy to write the downloaded ISO file to a USB drive (8GB or larger).
- Back Up Your Data: If you are installing Deepin on a machine with existing data, back up everything important to an external drive or cloud storage. The installation process can wipe your disk.
| Minimum System Requirements | Recommended Specifications |
| CPU: 2.0GHz single-core | CPU: 2.0GHz quad-core or better |
| RAM: 2 GB | RAM: 4 GB or more |
| Disk Space: 25 GB | Disk Space: 64 GB or more |
🧭 How to Begin the Installation
Deepin’s installer is famously streamlined and intuitive. The entire process is designed to get you up and running as quickly as possible.
- Boot from the USB Drive: Insert your bootable USB drive into the computer and restart it. You may need to press a key (often F2, F10, F12, or DEL) to enter the BIOS/UEFI settings and select the USB drive as the primary boot device.
- Installer Wizard: Once the Deepin environment loads, the installer will launch.
- Language & License: Select your preferred language and accept the license agreement.
- Disk Setup: This is the most critical step. You will be given two main choices:
- Full Disk: This option will erase the entire hard drive and automatically install Deepin. It’s the simplest choice if you are dedicating the whole computer to Deepin.
- Advanced: This option lets you create or select partitions manually. Use this if you want to install Deepin alongside Windows (dual-boot) or if you have a specific custom layout in mind. Proceed with caution here to avoid data loss.
- Finalize Installation: The installer will copy files to the disk. Once complete, it will prompt you to reboot. Remove the USB drive when asked, and your computer will boot into your new Deepin 25 system. You will then be guided through creating your user account and password.
⚙️ How to Personalize Your Desktop
The heart of the Deepin experience is the Deepin Desktop Environment (DDE). Customization is handled through the elegant Control Center, which slides out from the right side of the screen.
- Adjust Themes and Appearance: Navigate to the “Personalization” section in the Control Center. Here you can instantly switch between a system-wide light or dark theme, choose an accent color, and change icon packs.
- Configure the Dock: The dock is highly configurable. You can switch between “Fashion Mode” (a macOS-style centered dock) and “Efficient Mode” (a Windows-style taskbar that spans the width of the screen). You can also change its size and position.
- Enable Gestures: If you are using a laptop with a touchpad, explore the gesture settings. Deepin offers smooth, multi-touch gestures for navigating between workspaces, showing the desktop, and opening the application launcher.
- Use System Tools: Take advantage of the powerful global search by pressing
Super(the Windows key) and typing. You can find apps, files, and system settings instantly.
📌 How to Enhance Your System with Apps
A great desktop needs great applications. Deepin 25 offers a robust App Store that makes finding and installing software incredibly simple.
The Deepin App Store and Linyaps
The App Store is a curated marketplace featuring thousands of applications. One of the headline features of Deepin 25 is its support for the Linyaps package format. This new format is designed to be universal, allowing developers to package an application once and have it run across different Linux distributions.
| Package Format | Primarily Used By | Key Feature |
| DEB | Debian, Ubuntu, Deepin | Mature, vast repositories (apt). |
| RPM | Fedora, Red Hat, openSUSE | Robust, widely used in enterprise (dnf, yum). |
| Linyaps | Deepin 25+ | A new universal format for cross-distro compatibility. |
| Flatpak / Snap | Universal | Sandboxed, bundled dependencies, cross-distro. |
Using the Terminal for Power Users
While the App Store is excellent for discovery, you can still manage packages using the command line. Since Deepin is based on Debian, it uses the apt package manager.
Open the Terminal app and use these commands for quick software management:
<pre><code># First, refresh your list of available packages sudo apt update
Install a popular application like the GIMP image editor
sudo apt install gimp
Remove a package you no longer need
sudo apt remove gimp
Update all installed packages to their latest versions
sudo apt upgrade </code></pre>
By combining the beautiful DDE with the power of its App Store and underlying Debian base, Deepin 25 stands out as a compelling, modern, and user-friendly operating system for any PC.
More Topics
- How to Compare and Choose Modern Shells Beyond Bash
- How to Organize Large Photo Collections with KPhotoAlbum
- How to Build a Physical Computing Project with Raspberry Pi
- How to Safely Automate Sysadmin Tasks with Bash Scripts
- How to Get Started with Apache OpenServerless
- How to Create AI-Generated Images That Match Your Vision
- How to Design Logical Puzzles to Test AI Reasoning

