
After returning from a trip with lots of amazing photos and videos, I always find myself looking for a creative way to tell the story of my journey. Simply showing clips in chronological order can feel a bit flat. That’s when I discovered Mult.dev, a simple yet powerful online tool that can transform a travel itinerary into a dynamic and professional-looking animated map.
Table of Contents
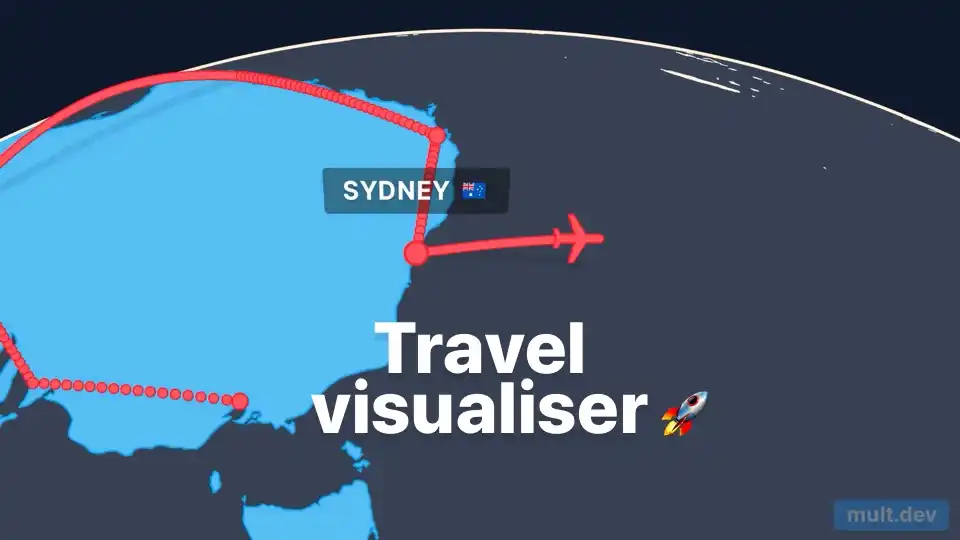
This tool is perfect for adding a creative touch to my travel videos. It allows me to create a geographical timeline of the places I visited, complete with animated lines, icons, and smooth transitions. The final animation can be exported as a video clip and inserted into my main video project, serving as a great introduction or as a transition between different locations.
Best of all, it’s a browser-based tool, so I don’t need any graphic design experience to create something visually stunning.
🗺️ Creating Your Animated Map Step-by-Step
The process of creating an animated map with Mult.dev is incredibly straightforward. The website guides you through every step. Here’s how I do it:
- I go to the Mult.dev website and click on ‘Create map animation’.
- The tool opens with a pre-filled route, which I first clear by clicking the trash can icon next to each location. A free registration is required to continue.
- I then start typing the name of my starting city into the search box and select it from the list that appears. I repeat this process for each stop on my itinerary.
- Once my route is complete, I click ‘Export’. Here, I can choose the video’s orientation, resolution, and frames per second (FPS).
- Finally, I click ‘Download’, and my animated map video is ready.
🚗 Customizing Your Journey
What I love about Mult.dev is the ability to customize the animation to better reflect my journey. By default, the travel between points is shown as an airplane flight. However, this can be easily changed.
To show a road trip, for instance, I can type a simple prompt into the text box labeled ‘Your trip in any words’. The prompt I use is: `trip by car: “starting city”, “stop1”, “stop2”, etc.`. The tool’s AI then recalculates the route to follow roads on the map, which is a fantastic touch.
Furthermore, I can add a soundtrack to my video to make it even more engaging. By clicking the gear icon, I can access the ‘Music’ section and choose a track from the available library to accompany my animation. It’s these little details that help me create a truly personalized and professional-looking travel video. If you’re interested in other ways to use AI for travel, this guide on how to plan a vacation with ChatGPT is a great resource.
More Topics
- Windows 11 – How to Monitor Your PC’s RAM
- Motorola Razr 60 – A Guide to the New Foldable with Moto AI
- Lenovo ThinkCentre Neo 50a – A Guide to the All-in-One PC
- Amazon Fire TV Stick – How Piracy and Sideloading Are Being Blocked
- Ring Cams – How to Use the New ‘Video Descriptions’ AI Feature
- Nothing Phone 3 – A Guide to Specs, Features, and Price
- ChatGPT-5 – A Guide to the New Features and Changes