If you work in IT, you know the drill: a user forgets their password, tries too many times, and locks themselves out. The ticket comes in, and you have to stop what you’re doing, open Active Directory Users and Computers (ADUC), search for the user, click through their properties, find the account tab, check a box, and click OK. It’s a simple task, but it’s a constant interruption.
Table of Contents
- 1.1 The PowerShell Script for Unlocking Users
- 1.2 How the Script Works: Understanding the Core Concepts
- 1.2.1 Storing Multiple Users with Arrays
- 1.2.2 Processing Each User with a ForEach Loop
- 1.2.3 Unlocking the Account with Unlock-ADAccount
- 1.3 Bonus: The “Unlock All” Power Move
- 1.4 Conclusion
- 1.5 More Topics
Now, imagine a network issue locks out an entire department. Unlocking accounts one-by-one becomes a massive time sink. This is where PowerShell turns a tedious, reactive task into a quick, proactive solution. With a simple script, you can get a list of all locked accounts and unlock them with a single command, turning you into an IT superstar.
The PowerShell Script for Unlocking Users
Instead of all that manual clicking, we can let PowerShell do the work for us. This script will find all locked-out users, display them in a numbered list, and let you choose which one to unlock.
PowerShell
# Import the Active Directory module to make the cmdlets available
Import-Module ActiveDirectory

# Find all locked-out user accounts in the entire domain
# It's best practice to "filter left" for efficiency
$LockedUsers = Search-ADAccount -LockedOut | Get-ADUser -Properties Name, SamAccountName

# If no users are locked out, exit gracefully
if (-not $LockedUsers) {
    Write-Host "No locked accounts found."
    exit
}

# Create a counter and display the locked users in a numbered list
$i = 0
$UserMenu = @{}
Write-Host "The following users are locked out:"
foreach ($User in $LockedUsers) {
    $i++
    $UserMenu.Add($i, $User.SamAccountName)
    Write-Host "$i`: $($User.Name) ($($User.SamAccountName))"
}

# Prompt the admin to select a user to unlock
$Selection = Read-Host "`nEnter the number of the user to unlock (or press Enter to exit)"

# If a valid number is chosen, unlock the account
if ($UserMenu.ContainsKey($Selection)) {
    $UserToUnlock = $UserMenu[$Selection]
    Unlock-ADAccount -Identity $UserToUnlock
    Write-Host "`nSuccessfully unlocked account: $UserToUnlock"
} else {
    Write-Host "`nNo action taken."
}
How the Script Works: Understanding the Core Concepts
This script introduces a few powerful concepts that are fundamental to PowerShell automation: arrays and loops.
Storing Multiple Users with Arrays
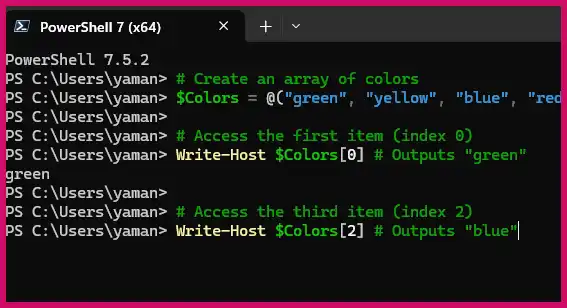
So far, we’ve used variables to hold a single piece of information, like a shoebox holding one pair of shoes. An array is like a whole wall of numbered shoe boxes; it’s a variable that can store a collection of many different values at the same time.
In PowerShell, you can create an array by separating values with a comma. Each item in the array is assigned a number, or index, starting from 0. This is known as zero-based indexing. You can access a specific item by referencing its index number in square brackets. The concept is similar to lists in Python.
PowerShell
# Create an array of colors
$Colors = @("green", "yellow", "blue", "red")

# Access the first item (index 0)
Write-Host $Colors[0] # Outputs "green"

# Access the third item (index 2)
Write-Host $Colors[2] # Outputs "blue"
In our script, the $LockedUsers variable becomes an array that holds all the user objects returned by the Search-ADAccount cmdlet.
Processing Each User with a ForEach Loop
Once we have a collection of items in an array, we often need to perform the same action on each one. Doing this manually for each item would be incredibly repetitive. This is where loops come in.
The ForEach loop iterates through each item in our array, allowing us to run a block of code for every single locked-out user.
PowerShell
# ($User is a temporary variable for the current item in the loop)
foreach ($User in $LockedUsers) {
    # This code runs once for each user in the $LockedUsers array
    Write-Host "Processing user: $($User.Name)"
}
In our script, we use this loop to build the numbered menu that is displayed to the administrator.
Unlocking the Account with Unlock-ADAccount
The Unlock-ADAccount cmdlet is a simple and direct command from the ActiveDirectory module. It does exactly what its name implies. Instead of navigating through multiple windows in ADUC, you can unlock an account with a single line of code, providing the username (or SamAccountName) as the -Identity.
PowerShell
Unlock-ADAccount -Identity "jdoe"
Bonus: The “Unlock All” Power Move
Sometimes, a network or server issue can cause a mass lockout event. In these emergency situations, unlocking accounts one by one is not practical. With three lines of PowerShell, you can unlock every single locked account in your domain.
Warning: Use this with caution. Account lockouts are an important security feature to prevent brute-force attacks. This script should only be used when you know there is a legitimate reason for a mass lockout.
PowerShell
# Get all locked-out user accounts
$LockedUsers = Search-ADAccount -LockedOut

# Loop through each locked user and unlock them
foreach ($User in $LockedUsers) {
    Unlock-ADAccount -Identity $User.SamAccountName
    Write-Host "Unlocked $($User.Name)"
}
Conclusion
This script is a perfect example of how PowerShell can transform a repetitive, manual IT task into an efficient, automated process. By leveraging core concepts like arrays and loops, you can create powerful tools that not only save you time but also allow you to be more proactive in managing your environment. You’ve now built a solid foundation for tackling even more complex automation challenges.
Burns B. Smirnov E. “Tiny PowerShell Projects“.

