
Of all the recurring tasks I’ve handled as an IT professional, creating user accounts and email addresses is probably the most frequent. While it might seem like a quick 15-minute job, those small tasks add up, especially when you’re dealing with system outages, security incidents, or new technology deployments. Automation is the key to taking these simple, repetitive items off your plate, which frees you up to focus on more critical issues and helps avoid burnout.
Table of Contents
- 1.1 The Goal: Applying an Email Address Policy
- 1.2 The PowerShell Script for Email Address Creation
- 1.3 How the Script Works: A Step-by-Step Breakdown
- 1.3.1 1. Using Variables to Store Information
- 1.3.2 2. Modifying and Composing Strings
- 1.3.3 3. Displaying the Output with a Cmdlet
- 1.4 Bonus Tip: Handling Special Characters in Names
- 1.5 More Topics
This guide will walk you through a foundational PowerShell project: automating the creation of email addresses based on a company policy. We’ll cover the basics of variables, string manipulation, and cmdlets to build a simple but effective script.
The Goal: Applying an Email Address Policy
Nearly every company has a standard convention for creating email addresses. A very common policy is to use the first letter of the employee’s first name, followed by their full last name.
So, for an employee named “John Doe” at the domain “tiny-powershell-projects.com,” the process would be:
- Take the first letter of the first name (“J”).
- Combine it with the last name (“Doe”).
- Add an “@” symbol.
- Finally, add the domain name.
Doing this manually for a long list of names is not only tedious but also prone to typos and inconsistencies. This script is designed to solve that problem efficiently.
The PowerShell Script for Email Address Creation
Here is the complete script we will be breaking down. It’s designed to be simple and easy to adapt for your own use.
PowerShell
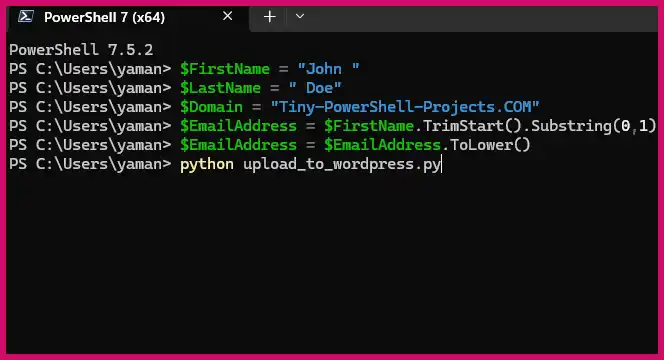
$FirstName = "John "
$LastName = " Doe"
$Domain = "Tiny-PowerShell-Projects.COM"
$EmailAddress = $FirstName.TrimStart().Substring(0,1) + $LastName.Trim() + "@" + $Domain
$EmailAddress = $EmailAddress.ToLower()
Write-Host $EmailAddress
How the Script Works: A Step-by-Step Breakdown
Let’s look at what each part of the script does.
1. Using Variables to Store Information
In PowerShell, a variable is a named container for data, and its name always starts with a dollar sign ($). It’s good practice to use descriptive names in “PascalCase,” where each word is capitalized, which is the standard for PowerShell cmdlets.
The first three lines of our script assign our raw data—the first name, last name, and domain—to variables using the = assignment operator.
PowerShell
$FirstName = "John "
$LastName = " Doe"
$Domain = "Tiny-PowerShell-Projects.COM"
Notice that $FirstName and $LastName have extra spaces. This is intentional to simulate messy data that you might copy-paste from a spreadsheet, which our script will clean up.
2. Modifying and Composing Strings
This is where the magic happens. In PowerShell, strings are powerful objects with built-in tools called methods that can perform operations. We can recognize methods because they end with parentheses ().
PowerShell
$EmailAddress = $FirstName.TrimStart().Substring(0,1) + $LastName.Trim() + "@" + $Domain
Let’s break down this line:
$FirstName.TrimStart(): The.TrimStart()method removes any whitespace from the beginning of the$FirstNamestring. There is also a.Trim()method that removes spaces from both ends..Substring(0,1): This method is chained directly onto the result of.TrimStart(). It extracts a part of the string, starting at position0(the first character) and taking1character in length. This gives us the first initial.$LastName.Trim(): Here, we clean up any whitespace from the beginning and end of the last name.+ "@" + $Domain: In PowerShell, you can combine, or concatenate, strings using the plus+sign. We use this to assemble all the pieces into the final email address format.
The next line ensures the entire address is in lowercase, which is a common convention for email administrators.
PowerShell
$EmailAddress = $EmailAddress.ToLower()
3. Displaying the Output with a Cmdlet
The final step is to display the result. For this, we use the Write-Host cmdlet. A cmdlet is a native command in PowerShell, and they all follow a Verb-Noun naming pattern.
PowerShell
Write-Host $EmailAddress
This command simply writes the contents of the $EmailAddress variable to the console.
Bonus Tip: Handling Special Characters in Names
If your organization has employees with non-ASCII characters in their names (like Günther or Amélie), the standard SMTP format won’t allow them. You can handle this in PowerShell using the -replace operator to substitute these characters with their ASCII equivalents.
PowerShell
# Replace an individual character
$EmailAddress = $EmailAddress -replace 'ü','ue'

# Use regular expressions to replace multiple characters with the same letter
$EmailAddress = $EmailAddress -replace '[íìïî]','i'
This ensures that all generated addresses are valid and deliverable.
Burns B. Smirnov E. “Tiny PowerShell Projects“.