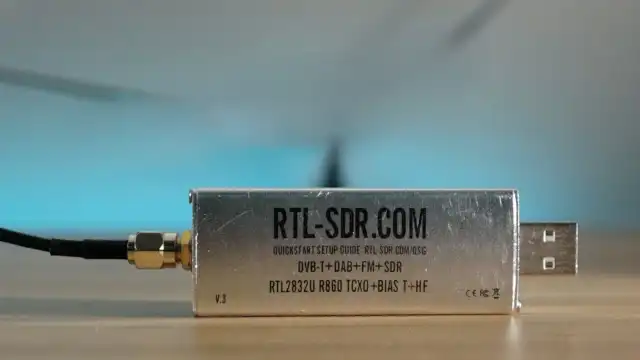
I’ve always been fascinated by the invisible world of radio waves. It’s amazing to think that with a simple and affordable USB stick like an RTL-SDR, I can turn my computer into an advanced radio receiver. This isn’t just about tuning into regular FM stations; it’s about listening to air traffic communications, amateur radio signals, and even satellite transmissions.
Table of Contents
The secret is Software Defined Radio (SDR), a technology that lets my PC’s software do the heavy lifting of decoding signals, eliminating the need for expensive hardware receivers. All I need is the RTL-SDR dongle, its small antenna, and a specific application like SDR# (SDRSharp) to start exploring the airwaves.
This setup is incredibly versatile and budget-friendly, making it perfect for anyone curious about the ‘noise’ of the ether. In this guide, I’ll walk you through the exact steps I took to get my station up and running.
🛠️ Step 1: Installing the Correct Drivers with Zadig
Getting the drivers right is the most critical part of the setup. When I first plug in my RTL-SDR dongle, Windows tries to install generic drivers, but these won’t work for SDR. So, I decline the automatic installation.
To install the correct drivers, I use a tool called Zadig, which is included in the SDR# software package. Here’s my process:
- I run `zadig.exe` as an administrator.
- In the Zadig window, I go to ‘Options’ and check ‘List All Devices’.
- From the dropdown menu, I select my device, which usually appears as ‘RTL2832U’ or something similar.
- I ensure that ‘WinUSB’ is selected as the target driver and then click ‘Install Driver’ (or ‘Replace Driver’).
This replaces the incorrect default drivers with the ones SDR# needs to communicate with the dongle. This process reminds me of the importance of correct drivers, a topic also covered in this guide on updating device drivers in Windows 11.
📡 Step 2: Setting Up SDR# Software
The software I use to control the radio is SDR#, which I get from the Airspy website. After downloading and extracting the files, I run a batch file called `install-rtisdr.bat` which downloads necessary components for the dongle to work with the software.
Once the drivers are set with Zadig, I can launch `SDRSharp.dotnet8.exe`. If it doesn’t open, it might be because the .NET 8 Runtime is missing, which is a quick download from Microsoft’s website.
Inside SDR#, the first thing I do is click the three-line menu icon, go to ‘Source,’ and select ‘RTL-SDR USB’. This tells the program to use my USB dongle as the signal source. Now, I’m ready to start listening.
📻 Step 3: Exploring the Airwaves
To begin scanning, I click the ‘Play’ button at the top of the SDR# window. This activates the dongle, and I can immediately see the live radio spectrum on the screen. The top part is the spectrum analyzer, where peaks indicate strong signals at specific frequencies. Below it is the ‘waterfall’ display, which shows signal activity over time.
Tuning to a station is easy. For example, to listen to an FM station at 102.15 MHz, I can either click on the numbers at the top to enter the frequency directly or use my mouse wheel over the spectrum to fine-tune it.
I can also adjust the gain (sensitivity) to get a better signal-to-noise ratio and use the built-in recorder to save any interesting transmissions I find. It’s a fascinating way to discover the hidden communications all around us. For those who enjoy tinkering, building a home NAS could be another rewarding project.
More Topics
- Windows 11 – How to Monitor Your PC’s RAM
- Motorola Razr 60 – A Guide to the New Foldable with Moto AI
- Lenovo ThinkCentre Neo 50a – A Guide to the All-in-One PC
- Amazon Fire TV Stick – How Piracy and Sideloading Are Being Blocked
- Ring Cams – How to Use the New ‘Video Descriptions’ AI Feature
- How to Turn a Travel Itinerary into an Animated Map Video
- Nothing Phone 3 – A Guide to Specs, Features, and Price

