This is a guide to The King is Watching and intro to the gameplay mechanics, tips, and strategies to prosper.
Table of Contents
- 1. Tips and Tricks
- 1.1 Kingdom Management
- 1.2 Encyclopedia
- 1.3 Gallery
- 1.4 Challenges
- 1.5 Council
- 1.6 Upgrades
- 1.7 Preparation
- 2. The Oracle Says
- 3. Holding down the fort
- 3.1 The Play Area
- 3.2 Building List
- 3.3 Castle Health
- 3.4 Wave Preview
- 4. Troop Management
- 5. Spells
- 6. King Abilities
- 7. Decisions, decisions
- 8. Care to browse my wares?
- 8.1 Buildings
- 8.2 Artifacts
- 8.3 Resources
- 8.4 Spells
- 8.5 Upgrades
- 9. Unforeseen disasters and Unexpected guests
- 10. Wisdom from a fellow King
- 10.1 Resources
- 10.2 Gaze
- 10.3 Troop Management
Tips and Tricks
Congratulations on your enthronement! Now comes every kings knightmare, management. This game being a mix of roguelike and tower defense, requires a good view of the overall situation (pun intended). Let’s look at your kingdom!
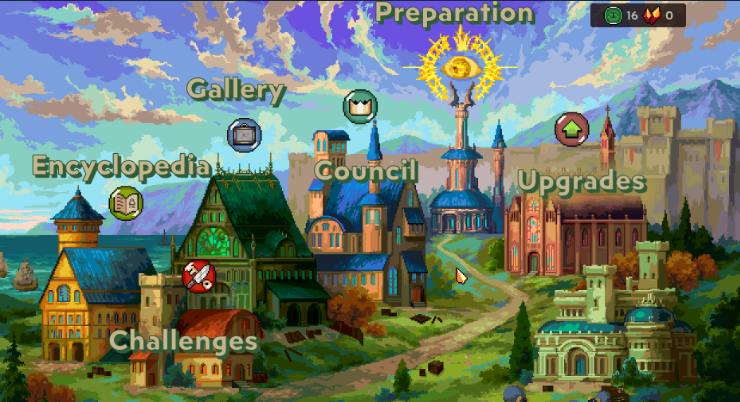
Here you have several different sections which are all locked in the beginning but are easily unlocked with starting currency.

Kingdom Management
Encyclopedia
This stores information on buildings you’ve unlocked including resource, barracks, and kingdom infrastructure
Gallery
This holds pictures detailing important moments during your reign. These will be unlocked as you progress with challenges
Challenges
As the name states these are challenges split into different kings. They are divided into conquering accomplishments and goal specific accomplishments.
Council
This building houses your advisors who provide useful buffs/bonuses to your run. Further gameplay allows unlocking of new council members and slots.
Upgrades
These are a collection of different unlocks to do everything from provide new buildings, units, run bonuses, and kings to play as.
Preparation
This is where you plan and start your runs. Here you can check your council members, set difficulty and select a king to play as.
The Oracle Says
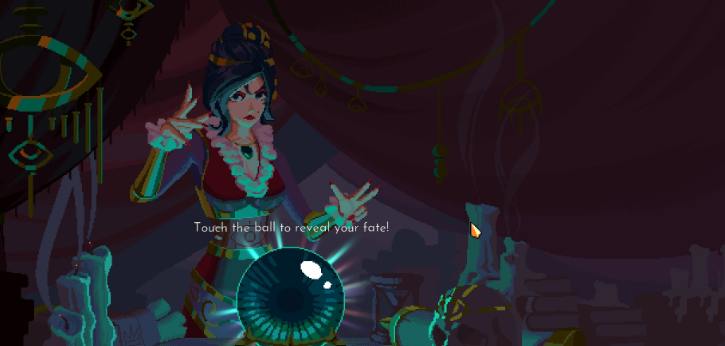
As you begin a new run, you are greeted by the kingdom Oracle I call Griselda.
She is quite the piece of work, as she only ever has bad news for us. Your first meeting has her inform you of the pending boss raid looming. It’s better than nothing since you can take this chance to plan accordingly. Different bosses require different strategy unless you plan to brute force it.
She shows up again during the run to provide you with an opportunity to change your fate by way of Prophecy, offering a way to arrange the inevitable waves so that you can prepare for them. In addition there are options where you add enemies to the incoming waves in return for rewards. These rewards can be anything from Denarii – the in game currency, to resources, buildings, building/troop upgrades or even artifacts.
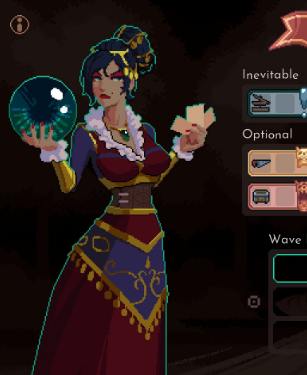
As you start you will be pitifully weak, however fortune favors the bold. Should you do a good job in arranging the waves, you can come out stronger for it.
Holding down the fort
As most do, you probably jumped into your first defense. That is fine, since this will not be the last time. As you took to the battlefield, you probably took note of the UI. There are a number of different elements that we should look more in depth at.
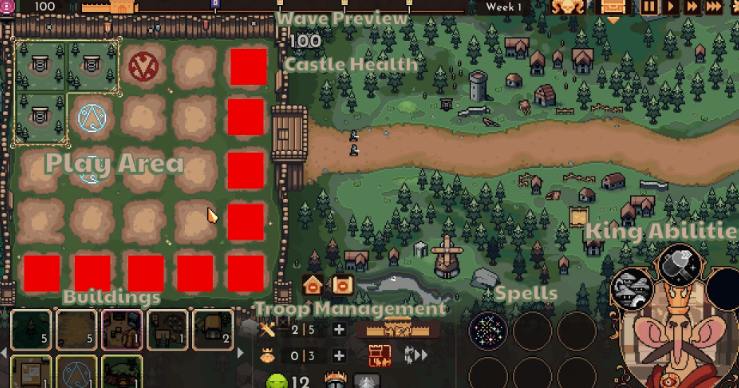
The above is a view of the battlefield. There are several sections we will look at.
The Play Area
Where you will place resource buildings, barracks, and kingdom infrastructure consists of 25 individual tiles, only 16 of which are unlocked at the start. The remaining tiles will be occupied by noble dwellings which can be removed through the upgrades menu.
Important things to note:
- The saying “out of sight, out of mind” applies here. There is a “view” called gaze which you can move around and turn (right click) to select different tiles. The tiles that make up your view will produce their respective items, be they resources or troops. All other tiles will not function. Some specific artifacts and kingdom infrastructure can change this behavior for certain tiles.
- Placements are final. Planning ahead is important not only for resource management, but also troop management
- Resources are finite. Each production tile has a set number of resources it will provide based on the tier. This can be improved with the use of artifacts found during gameplay.
Building List
All your current and future blueprints will be here as you acquire them through gameplay. You start with 3 free wells every game that can be demolished/rebuilt for free. Buildings that are grayed out are lacking the resources to construct them.
Castle Health
You start with 100 health that can fall due to attack, but can also be raised via specific buildings, artifacts. Most enemies deal single units of damage with the exception of some heavy infantry and bosses. Damaged walls can be repaired with kingdom infrastructure like the Brick Factory.
Wave Preview
In the beginning, you will navigate the first few waves as they come. The preview shows you not only the time until the next wave, but also allows you to see the units coming in that wave. As you progress in the run, events like Prophecy will allow you to change the order of the waves and even increase the challenge for a chance at rewards that will boost your run.
Troop Management
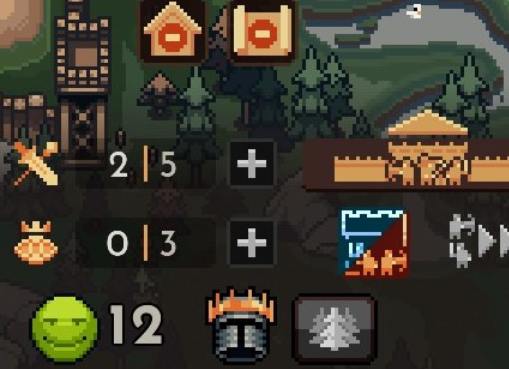
This area houses several components critical to gameplay.
- Troop Capacity – This shows the maximum number of units that can be deployed to the field at any one time, not including temporarily summoned troops. This limit can be upgraded multiple times up to a base max capacity of 20. Each upgrade costs wood in doubling amounts starting with 80.
- Gaze Upgrade – Your initial gaze can be upgraded to activate more buildings at once. The upgrades require gold and other resources, and can be upgraded multiple times. Some specific events allow upgrading by meeting certain conditions (more about that later).
- Morale – This is a mechanic that changes its bonus dependent on the king that you play as. The initial king sees a 1% increase in troop damage per 1 morale. Morale can be raised several ways including: multiple unit types, passive upgrades of certain buildings, effects of certain buildings, artifacts, and wine. These options can stack.
- Troop Class Bonuses (the helmet) – This shows all currently active modifiers, obtainable through troop training, barracks upgrades, artifacts, or passives from other buildings.
- Deployment Style – Arguably the most important part of this section, it is a 3-option toggle that changes how troops are trained/deployed. The default is Spawn Troops on Battlefield, denoted by orange. Blue denotes Spawn Troops in Barracks, while a mix of the two is Spawn to Capacity. I’ll go more in detail later.
- Troop Ledger (house looking thing) – This shows the troops you currently have, their status whether they are deployed or in the barracks, and gives you options to deploy/recall troops.
Spells
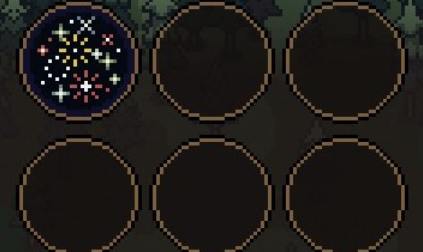
This area is straightforward, you have 6 slots which can be expanded via bonuses provided by specific council members that can be unlocked.
King Abilities
Each king has three abilities that can be unlocked by completing their respective challenges. Each can be a powerful tool, for example the ones shown in the screenshot at the beginning of the chapter allow spawning of a trio of peasants every so often at the cost of 30 water, and speeding up production for 10 seconds at the cost of 20 gold at a longer interval. These have cooldowns which can be reduced via specific kingdom infrastructure, or artifacts.
Decisions, decisions
As a roguelike, you should expect choices often. Some you will be happy with, some you will come to regret later in the run. During your run you’ll be given choices in several occasions, the most common of which are post wave rewards. These rewards are usually divided into classes such as barracks, resources or resource buildings, kingdom infrastructure, troop training, or artifacts.
Though your choice is final, you can change the available options by re-rolling using Denarii. The first re-roll is 10 with each subsequent roll costing double. There is an artifact that allows for a single free re-roll though you’ll need to have luck to get it.
In addition to the post wave rewards, there are several buildings that will generate options or can be upgraded to provide options, such as the research table.
Care to browse my wares?
During the run you will encounter the Trader, who I refer to as Sultan Al Biz and his frog steed Jeffrey. He brings various knick knacks for you to spend your Denarii on.
Buildings
The main row (purple) consists of resource buildings, barracks, and kingdom infrastructure. The price varies based on the tier with 15 being the lowest and some options as high as 60.
Artifacts
In the blue section are the artifacts. These have a base price of 60 Denarii. I highly recommend pausing your game before the wave he shows up in order to sell any blueprints you aren’t planning to use for some extra funds. The scroll with the minus sign is used for this purpose. The house next to it allows for demolishing buildings.
Resources
Below the artifacts is the resources section, usually capped at 20 Denarii. The selection rotates, and as the waves progress, the amount of resources increases while the price remains the same.
Spells
Across from the artifacts are the spells (red). These vary in price and can contain any spells you have unlocked. The price is usually capped at 35 regardless of tier.
Upgrades
Below the spells are upgrades. These consist of troop upgrades, troop training, or building upgrades. The price varies depending on the item.
Unforeseen disasters and Unexpected guests
As king, you are naturally expected to see to the concerns of the people of your kingdom. Every once in a while they pay you a visit to plead their case.
In these events, you are often given three options, each with its own reward or consequence. Do you choose based on your needs? Do you choose based on your conscious? Or do you choose a just route proving your sovereign magnanimity? The choice is yours.
Note: Some event options require payment of your resources.
Wisdom from a fellow King
Having played this game for hours during the demo and even more hours since release, I have some tips and tricks for making your game a little less daunting.
Resources
This is the most important part of your run, as you can’t build anything or do upkeep without resources. In the start you are given three wells which you should immediately place and start watching. I usually pause during several points in the run to plan out where I am and where I plan to be. After the first few waves, you should have a general idea of the troop types you are going to focus on for the run, in which case I suggest making those choices any time they come up. The research table, while slow is useful for getting blueprints for the basic resource buildings. This, coupled with the Old Hoe artifact which doubles the resource amount for those buildings, can set you up for long term success should you get it early. Remember that some advanced resources require multiple basic resources, for example, oil requires both water and wood. Should you have other buildings or barracks that require those resources, you’ll have to make sure production is able to keep up.
Gaze
Each king has a different gaze, making planning even more important as you play. You can upgrade your gaze several times depending on the king, and there is even a chance event that allows a ‘free’ upgrade should you have 50 grapes on hand. I try to fast track my first upgrade, usually trying to get it before the third wave. From there, depending on whether I get the event or how the run is going, I manage from there upgrading as necessary. There are ways to go about getting tiles to run while not under gaze, those being artifacts, kingdom infrastructure, or king abilities. My favorite combo is the artifact that allows the center tile to work, with the Monument to The Kings Gaze which allows adjacent buildings to work while not under gaze. I usually pair the two and have things that generate over a long period of time like the research table or hospital take position on the adjacent spaces.
Troop Management
As you start, you’ll have access to a limited amount of barracks, so building everything you get your hands on isn’t a terrible strategy in early game. The important thing is to start specializing when possible. This helps not only in resource management, but also maximizes gains from their respective upgrades while shrinking the selection pool when upgrade chances are presented. After getting several Militia barracks in a row, I went full in on that and got the upgrades to fully maximize their utility. Also notice how low my resources are. At several points in the run I had several sawmills and wheat fields running at the same time at one point having 5 sawmills/trees going at once to stockpile.
Note the deployment option in the troop management section of the screenshot. That option is called Spawn to Capacity. This is the most important thing to know for late game play. Keeping it on the default will only create troops til your troop capacity, not to the capacity of your barracks. Even having several different types of barracks can be feasible on this option. Then you can deploy as needed.
By bulldozer66
- The King is Watching: A Complete Guide to Kingdom Infrastructure
- The King is Watching: A Complete Guide to All Elite Fighters Barracks
- The King is Watching: A Complete Guide to All Veteran Barracks
- The King is Watching – A Complete Guide to All Recruit Barracks
- The King is Watching – A Guide to Improved Production Buildings
- The King is Watching – All Modernized Production Buildings & Upgrades
- The King is Watching – Tips on Waves, Production, and Magic