
The magic of what is the golden hour and how do you use it in photography lies in the light itself. The golden hour—just after sunrise or before sunset—bathes the world in soft, warm hues that flatter almost any subject. Mastering this window transforms your portfolio.
Table of Contents
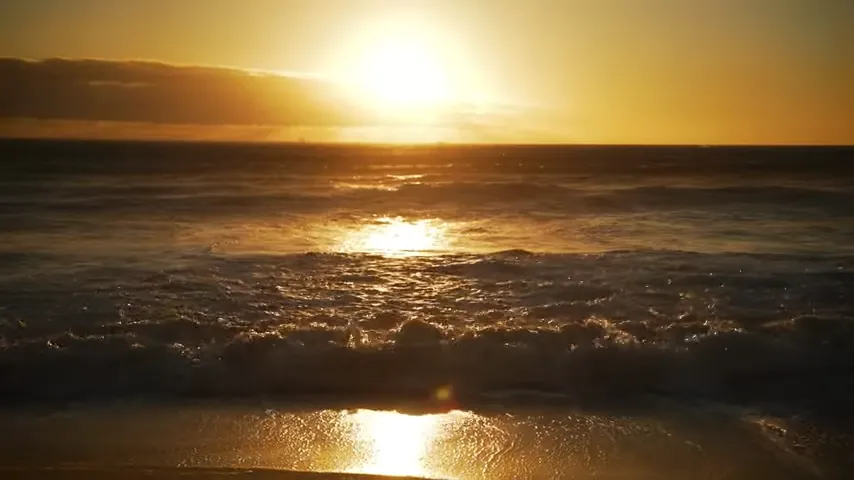
⏰ Timing and science behind golden hour
Golden hour begins when the sun is low on the horizon. The angle creates longer shadows and diffused light. This produces rich color, soft contrast, and depth without harshness.
Track the light with apps or watch how sunlight hits buildings and clouds. You’ll notice changing intensity and hue over minutes. Plan shots in advance—golden hour is brief and precious.
📸 Best genres for golden hour shooting
Portraits glow with flattering skin tones and catchlights. Landscapes reveal texture in hills, sand, or foliage. Street photography gains dimension through shadows and reflections. Even architectural shots improve when glare fades and edges soften.
Position subjects so the light grazes their side or back—this enhances depth and creates rim light. Use wide apertures (f/2.8 or f/4) to isolate subjects and let background light melt away.
🎨 Adjusting for best results
Set white balance to Daylight or Cloudy to preserve warm tones. Avoid Auto, which may neutralize golden hues. Keep ISO low (100–400) for clean files and meter carefully to avoid clipping highlights.
Experiment: silhouette your subject against the sun, or shoot flare-filled frames with the light entering from the edge. Golden hour rewards playfulness. Be ready, stay open, and shoot fast—the moment won’t last long.
More Topics
- What Is a Prime Lens and Why Should You Use One?
- How to Photograph in Harsh Daylight Without Losing Detail
- How to Improve Your Photography Composition Skills Today
- How to Choose the Best Travel Camera for 2025
- How to Light Portraits at Home on a Budget
- How to Master Manual Mode on Your Camera in 2025
- How to Shoot Stunning Street Photography in Istanbul