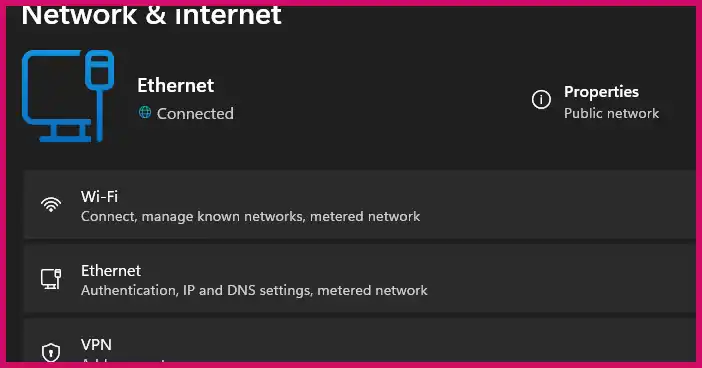
I’ve run into this classic Windows networking issue countless times: you can successfully ping another computer on your local network, but when you try to access its shared files in File Explorer, you’re hit with an “Enter network credentials” prompt that rejects every password you try, even when you’ve set up passwordless sharing. The connection works one way but not the other.
Table of Contents
This frustrating problem is usually caused by a combination of factors, including firewall rules, incorrect service settings, a conflict with saved credentials, or modern Windows security policies that block anonymous guest access by default. Based on a common troubleshooting process, here is a structured guide to fix it, starting with the computer you want to connect to (the “server”) and then moving to the computer you are connecting from (the “client”).
Part 1: Configure the PC You Want to Access (The Windows 10 “Server”)
These steps ensure the target machine is correctly set up to share files on your private network. Run these commands in an elevated PowerShell window on that computer.
1. Ensure the Network Profile is “Private” Windows applies much stricter security rules to “Public” networks. For home or office LANs, your network should be set to “Private.”
- Check the current profile:
Get-NetConnectionProfile - If it says “Public,” change it (replace “Ethernet” with your network adapter’s name if different):
Set-NetConnectionProfile -InterfaceAlias "Ethernet" -NetworkCategory Private
2. Check That Sharing Services are Running File sharing relies on a few key services.
- Verify the services:
Get-Service LanmanServer, FDResPub - Ensure both
LanmanServer(the Server service) andFDResPub(Function Discovery Resource Publication) areRunning. If not, start them:Start-Service LanmanServer; Start-Service FDResPub
3. Configure the Windows Defender Firewall The firewall is the most common culprit. You must allow “File and Printer Sharing” for your private network.
- Enable the necessary firewall rules:
Enable-NetFirewallRule -DisplayGroup "File and Printer Sharing"
Part 2: Enable True Passwordless (Guest) Sharing (Advanced)
If you want to access shares without entering a username and password, you need to enable anonymous guest access. Warning: This reduces the security of your network. Only proceed if you are on a trusted private LAN.
On the Windows 10 “Server” PC (run in Admin PowerShell):
- Turn Off Password Protected Sharing: Open Control Panel > Network and Sharing Center > Change advanced sharing settings. Under “All Networks,” select Turn off password protected sharing.
- Enable the Guest Account:
net user Guest /active:yes - Allow Anonymous Access to a Specific Share: To test, let’s create a share named “PublicShare” and explicitly allow anonymous access to it through the registry.
# Create the test folder and share New-Item -Path 'C:\PublicShare' -ItemType Directory -Force New-SmbShare -Name 'PublicShare' -Path 'C:\PublicShare' -FullAccess Everyone -Force # Use .NET method to correctly set the required registry key $regKey = [Microsoft.Win32.Registry]::LocalMachine.OpenSubKey("SYSTEM\CurrentControlSet\Services\LanmanServer\Parameters", $true) $regKey.SetValue("NullSessionShares", @("PublicShare"), [Microsoft.Win32.RegistryValueKind]::MultiString) $regKey.Close() # Restart the Server service to apply changes Restart-Service -Name LanmanServer -Force
On the Windows 11 “Client” PC (run in Admin PowerShell): By default, modern Windows versions block clients from connecting to shares that use insecure guest access. You must enable this on the machine you’re connecting from.
- Allow Insecure Guest Authentication:
reg add "HKLM\SYSTEM\CurrentControlSet\Services\LanmanWorkstation\Parameters" /v AllowInsecureGuestAuth /t REG_DWORD /d 1 /f - Restart the Workstation Service:
Restart-Service -Name LanmanWorkstation -Force
Part 3: Connect From Your Main PC (The Windows 11 “Client”)
After configuring the server, return to your main PC and try to connect.
1. Clear Cached Network Credentials Windows may have saved old, incorrect credentials. It’s best to clear them out.
- Open an elevated Command Prompt or PowerShell and run:
cmdkey /delete:DELL-LAPTOP(ReplaceDELL-LAPTOPwith the name or IP address of the target computer) .
2. Test the Connection by IP Address Using the IP address is the most reliable way to connect, as it bypasses any name resolution issues.
- Press Windows Key + R to open the Run dialog.
- Type two backslashes
\\followed by the IP address and share name, like so:\\19e2.168.1.71\PublicShare - Press Enter. The shared folder should now open without prompting for a password.
A More Secure Alternative: The safest way to set up passwordless sharing on a trusted network is to create identical local user accounts with the same username and password on both computers. Windows will then authenticate seamlessly using those matching credentials without prompting you.
More Topics
- Windows 11: How to Fix Wi-Fi and Bluetooth Issues Caused by Update
- Windows 11: Why You Can’t See Your Microsoft Account Password
- How to Fix a Video Stream That Won’t Play on Your PC (But Works on Your Phone)
- Windows 11 – How to Fix PIN Setup Not Working
- Windows 11 – How to Monitor Your PC’s RAM
- Windows 11 – How to Use the New Quick Machine Recovery Feature
- How to Fix Slow BIOS Load Times and PC Crashing

