
While Windows 11 “debloat” scripts are popular for their promise to speed up the operating system by removing “bloatware,” they can often cause unexpected issues, such as broken system features and even reduced performance in games. This guide explains why these problems occur and how you can fix them.
Table of Contents
How Debloat Scripts Can Damage Windows
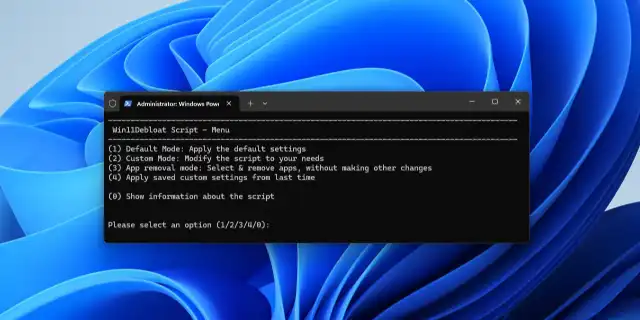
Debloat scripts are aggressive PowerShell commands that disable or remove core Windows services and applications that the script’s author considers unnecessary. While this can free up some resources, it can also lead to significant problems:
- Broken System Functionality: As described in your case, a primary feature like Windows Search can break. This is because debloat scripts almost always disable the “Windows Search” and indexing services to “reduce background processes,” which prevents your computer from indexing files and makes search non-functional.
- Reduced Gaming Performance: It may seem counterintuitive, but debloating can harm gaming performance. Scripts often disable services like SysMain (formerly Superfetch), which preloads frequently used applications and game files into RAM. On a modern system with a fast NVMe SSD, disabling this service can lead to slower map and asset loading, as the system can no longer intelligently cache files.
- Driver and Software Conflicts: These scripts can sometimes interfere with manufacturer-specific software (like ASUS Armoury Crate on a G14 laptop), which can disrupt performance profiles and power management, leading to instability.
How to Fix a “Debloated” Windows Installation
Reversing the changes made by a debloat script can be difficult, but here are the most effective methods, from simplest to most reliable.
1. Use a Revert/Undo Option in the Script
- Many reputable debloat scripts include a function to revert the changes they made. Check the documentation or the menu of the script you used (e.g., on its GitHub page) for an “undo,” “revert,” or “restore to default” option.
2. Use Windows System Restore
- If you created a System Restore point before running the script, you can roll your system back to its previous state.
- Type “Create a restore point” in the Start Menu and open it.
- Click on “System Restore…” and follow the prompts to choose a restore point dated before you ran the script.
3. Manually Re-enable Key Services (Advanced)
- You can try to manually fix specific issues like the broken search.
- Press Win + R, type
services.msc, and press Enter. - Find the “Windows Search” service, right-click it, go to Properties, change the “Startup type” to “Automatic (Delayed Start),” and click Start.
- You can do the same for the “SysMain” service to potentially improve loading times.
- Press Win + R, type
- Note: This will likely not fix all the underlying issues created by the script.
4. Reset Your PC (Recommended Solution)
- The most effective and guaranteed way to fix all issues caused by a debloat script is to reset your Windows installation. This will restore all default services, applications, and settings.
- Go to Settings > System > Recovery.
- Click the “Reset PC” button.
- You can choose “Keep my files,” but for the best results after running a deep system-altering script, it is highly recommended to back up your important files externally and choose “Remove everything.” This will give you a truly fresh start.
More Topics
- Windows 11 – How to Fix a Start Menu That Cannot Be Clicked
- Windows 11 – How to Stop Your Mouse From Waking Up Your PC
- Windows 11 – How to Fix a New PC Stuck on an Update Screen
- Windows 11 – How to Fix ‘Device Needs to Be Repaired’ Error After Reinstallation
- Windows 11 – How to Fix Bold Icon Text After Unlocking
- RTKVHD64.sys – How to Uninstall The Realtek Audio Driver
- How to Fix Windows 11 Update Installation Failures