You’ve just updated to the latest version of Windows 11, the 23H2 feature update, expecting new features and a smooth, polished experience. Instead, you’re met with a performance nightmare: extreme, constant stuttering that makes your entire PC feel sluggish and nearly unusable.
Table of Contents
- 1.1 Understanding the Culprit: What is Desktop Window Manager (DWM)?
- 1.2 Troubleshooting DWM Stuttering in 23H2 (Try These Fixes First)
- 1.2.1 1. Update Your Graphics Drivers (The Most Common Fix)
- 1.2.2 2. Run the System File Checker (SFC) and DISM Tools
- 1.2.3 3. Check for Problematic Software
- 1.3 The Last Resort: How to Roll Back from 23H2 to 22H2
- 1.3.1 CRUCIAL WARNING: The 10-Day Limit
- 1.3.2 Step-by-Step Rollback Guide
- 1.3.3 What if the “Go back” Option is Missing?
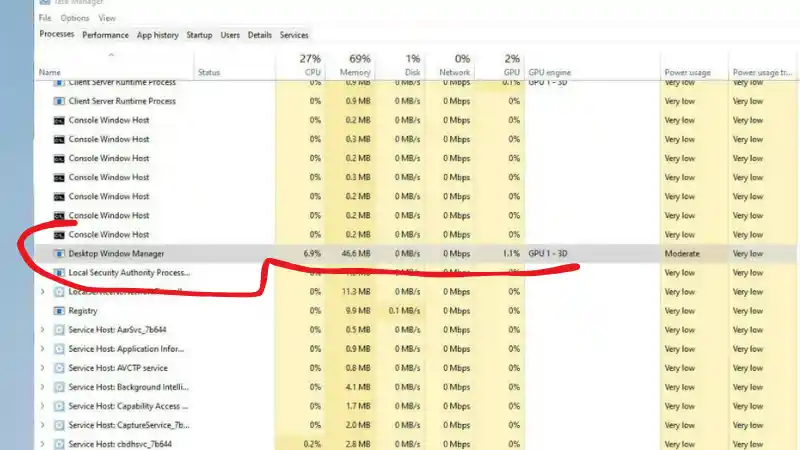
A quick look at your Task Manager reveals the likely culprit: a process called Desktop Window Manager (DWM.exe) is using an enormous amount of your CPU or GPU resources, “going nuts” for no apparent reason.
If this is happening to you, you are not alone. This is a frustrating and surprisingly common issue for some users after a major Windows feature update, and it’s especially prevalent for those who have recently had to perform a system restore or rollback, as this can lead to corrupted update files.
This guide is your complete roadmap to solving this problem. We will walk you through a series of potential fixes to get the Desktop Window Manager under control. And, if all else fails, we will provide a detailed, step-by-step guide on how to safely roll back your system from version 23H2 to the more stable 22H2, which is the ultimate solution if the stuttering persists.
Understanding the Culprit: What is Desktop Window Manager (DWM)?
Before we dive into the fixes, it helps to understand what this process is and why it’s causing problems. The Desktop Window Manager (or dwm.exe) is a core and essential system process in Windows. It is responsible for rendering all the beautiful visual effects, or “compositing,” that you see on your screen. This includes:
- The translucent, glassy effects of windows and the Start Menu (Mica and Acrylic effects).
- Live, animated thumbnails when you hover over items on your taskbar.
- High-resolution animations for opening and closing windows.
- Overall management of how application windows are drawn on your screen.
Because DWM is at the heart of everything you see, any issues with your computer’s graphics drivers, corrupted system files, or even conflicts with certain third-party applications can cause it to malfunction and use an excessive amount of CPU or GPU resources. When this happens, the result is the system-wide stuttering and lag that you are experiencing.
Troubleshooting DWM Stuttering in 23H2 (Try These Fixes First)
Before you take the drastic step of rolling back your entire operating system, it is highly recommended that you try these troubleshooting steps. In many cases, one of these solutions can resolve the DWM issue without requiring a full rollback.
1. Update Your Graphics Drivers (The Most Common Fix)
This is the number one cause of DWM issues after a major Windows update. A new Windows feature update often changes how the OS handles graphics rendering, which means your existing graphics driver may no longer be fully compatible. NVIDIA, AMD, and Intel almost always release new, optimized drivers specifically for new Windows versions.
- How to fix it: Go directly to the official website for your graphics card manufacturer (NVIDIA, AMD, or Intel). Do not rely on Windows Update to find the best driver. Download the latest available driver for your specific GPU model and perform a clean installation, which removes the old driver files before installing the new ones. Restart your PC and see if the stuttering is resolved.
2. Run the System File Checker (SFC) and DISM Tools
The Windows update process itself, or the system crash that led to your rollback, could have corrupted some of your core operating system files. These two built-in command-line tools are excellent for finding and repairing that damage.
- How to run them:
- Click the Start Menu and type
cmd. - Right-click on “Command Prompt” and select “Run as administrator.”
- First, run the DISM tool to repair the Windows component store. Type the following command and press Enter (this may take several minutes):
DISM /Online /Cleanup-Image /RestoreHealth - Once DISM is complete, run the System File Checker. Type the following command and press Enter:
sfc /scannow - This tool will scan all protected system files and replace any that are corrupted. Once it’s finished, restart your PC.
- Click the Start Menu and type
3. Check for Problematic Software
Some third-party applications, especially those that modify the Windows UI and visual effects, can conflict with DWM after an update. This includes software like wallpaper engines, custom theme applications, or certain accessibility tools. Try temporarily disabling or uninstalling any such software to see if the stuttering stops.
The Last Resort: How to Roll Back from 23H2 to 22H2
If you have tried all the troubleshooting steps above and the DWM stuttering persists, then rolling back to the previous version of Windows 11 is your most reliable solution.
CRUCIAL WARNING: The 10-Day Limit
You must read and understand this before you proceed. By default, you can only roll back to a previous version of Windows within 10 days of installing a major feature update (like 23H2). After 10 days, to save disk space, Windows automatically deletes the old installation files (which are stored in a folder called Windows.old on your C: drive). Once these files are gone, the “Go back” option will disappear from your settings, and you will not be able to roll back.
Step-by-Step Rollback Guide
If you are within the 10-day window, the process is safe and straightforward.
- Open the Settings app (you can press
Windows Key + I). - In the System tab, scroll down and click on Recovery.
- Under the “Recovery options” section, you should see an option labeled “Go back.” If this option is available and not greyed out, you are within the 10-day window. Click it to begin.
- A blue-screen wizard will appear and ask you for your reason for rolling back. You can select any of the options (e.g., “My apps or devices don’t work on this build”) and click Next.
- The wizard will offer to check for new updates to try and fix the problem. Since you’ve already done this, click “No, thanks.”
- The system will give you a final set of warnings. Read them carefully, and then click Next until you see the final “Go back to earlier build” button. Click it to begin the process.
Your computer will restart several times, and the process may take a while. Do not turn off your PC during this time. When it is finished, you will be back on your previous, stable version of Windows 11 22H2.
What if the “Go back” Option is Missing?
If the “Go back” button is greyed out or missing, it means it has been more than 10 days since your update, and the old installation files have been deleted. At this point, the only way to return to 22H2 is to perform a clean installation of Windows 11 22H2 from a USB drive. This is a much more complex and destructive process that will erase all of your files and applications, and it should only be attempted by advanced users after backing up all their important data.
- How to Fix a Broken Windows 11 Update After Using Winreducer or Tweaking Tools
- How to Fix Windows 11 Updates Stuck in a Restart Loop
- How to Fix Steam Desktop Shortcuts Not Working on Windows
- How to Disable BitLocker During Startup in Windows 11
- How to Fix Windows 11 Firewall Won’t Turn On After Update: Error 0x80070422 / 1058
- How to Fix “Can’t Drag Files to the Desktop” Using the Show Desktop Shortcut in Windows 11
- How to Fix “Can’t Change Your Username” Folder in Windows 11