
I’ve seen this maddening issue pop up for many Windows 11 users: you go to Settings > Accounts > Sign-in options to set up a Windows Hello PIN, you enter your account password, and then… nothing happens. The setup window disappears or hangs, leaving you unable to proceed. Based on my troubleshooting experience, this is usually caused by corrupted data in a specific system folder (called NGC), a problem with your computer’s security chip (TPM), or an issue with Windows’ own sign-in services.
Table of Contents
Here’s a step-by-step guide to fix it, starting with the quickest and safest solutions first.
Before You Begin: Quick Checks
Before diving into more complex steps, I recommend trying these simple checks first.
- Reboot and Reconnect: Restart your PC and make sure it has a working internet connection before trying to set up the PIN again.
- Use an Administrator Account: Ensure you are signed into an account with Administrator privileges. You cannot set up a PIN from a standard user account.
- Back Up Your BitLocker Key: This is critical. If your device uses BitLocker drive encryption, back up your recovery key before proceeding. Some of the fixes below involve the TPM, which could render your encrypted data inaccessible without the key.
How to Fix the Windows 11 PIN Setup Process
Follow these methods in order. The NGC folder deletion is the most common fix, but it’s best to try the less invasive steps first.
1. Use the “I forgot my PIN” Option
The simplest solution is to use the built-in reset function.
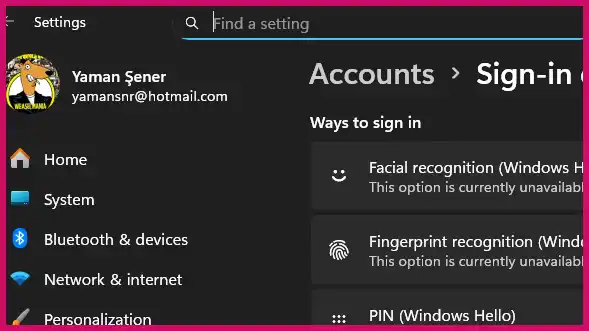
- Go to Settings > Accounts > Sign-in options.
- Click on PIN (Windows Hello).
- If you see an “I forgot my PIN” link, click it and follow the on-screen prompts. If this works, you’re all set. If it hangs like the setup button did, move to the next step.
2. Restart the Credential Services
Sometimes, the Windows services that manage your login credentials just need a quick restart.
- Press Windows Key + R to open the Run dialog.
- Type
services.mscand press Enter. - In the Services window, find and right-click each of the following services, then select Restart:
Credential ManagerWindows Biometric Service
- Once restarted, try setting up your PIN again.
3. Delete the NGC Folder (Most Common Fix)
This is the solution that works for the vast majority of users experiencing this problem. It involves deleting the folder where Windows stores PIN information, forcing the system to recreate it from scratch.
Warning: You must have Administrator rights to perform these steps.
- Right-click the Start button and select Windows Terminal (Admin) or PowerShell (Admin).
- Execute the following two commands one by one to take ownership of the NGC folder. Copy and paste each line, then press Enter:PowerShell
takeown /f "C:\Windows\ServiceProfiles\LocalService\AppData\Local\Microsoft\NGC" /r /d yPowerShellicacls "C:\Windows\ServiceProfiles\LocalService\AppData\Local\Microsoft\NGC" /grant Administrators:F /t - Now, execute the following command to delete the folder:PowerShell
rd /s /q "C:\Windows\ServiceProfiles\LocalService\AppData\Local\Microsoft\NGC" - Restart your PC. After rebooting, go back to Settings > Accounts > Sign-in options and try setting up the PIN again. The process should now work correctly.
4. Check Your TPM Status
The Trusted Platform Module (TPM) is a security chip on your motherboard that handles encryption for features like your PIN. If it’s having issues, PIN setup will fail.
- Press the Start button and type
tpm.msc, then press Enter. - A window will appear showing the TPM’s status. If it reports any errors, they must be resolved first.
- Warning: The TPM management console gives you the option to “Clear TPM.” This is a last resort and will remove all encryption keys stored on the chip. Do not do this unless you have backed up your BitLocker recovery key, as it can lead to permanent data loss.
5. Repair Corrupt System Files
If the problem persists, it’s possible some Windows system files are corrupted. You can use two built-in tools, SFC and DISM, to scan for and repair them.
- Open Windows Terminal (Admin) or PowerShell (Admin).
- Run the System File Checker first:PowerShell
sfc /scannow - After it completes, run the DISM command:PowerShell
DISM /Online /Cleanup-Image /RestoreHealth - Reboot your PC and try the PIN setup again.
More Topics
- Windows 11: How to Fix Wi-Fi and Bluetooth Issues Caused by Update
- Windows 11: Why You Can’t See Your Microsoft Account Password
- How to Fix a Video Stream That Won’t Play on Your PC (But Works on Your Phone)
- Windows 11 & 10: How to Fix Network Sharing and “Enter Network Credentials” Errors
- Windows 11 – How to Monitor Your PC’s RAM
- Windows 11 – How to Use the New Quick Machine Recovery Feature
- How to Fix Slow BIOS Load Times and PC Crashing